SAP Open Connectors currently supports events via polling or webhooks depending on the endpoint.
- Polling is a mechanism where SAP Open Connectors executes the configured query every
nminutes and captures the changed information. - Webhooks are when the provider lets SAP Open Connectors know what information has changed. Note that additional endpoint setup may be required prior to creating your Connector Instance.
If you would like to see more information on our Events framework, see Events Overview.
Set Up Events for Facebook Lead Ads
The Facebook Lead Ads connector supports webhooks for Lead Generation events. For Facebook Lead Ads events to work with SAP Open Connectors, use the Webhook URL created after provisioning to set up the Webhook product in Facebook. See the Facebook webhook documentation for more information about how Facebook uses webhooks.
ad-accounts resource that represents an entity who creates and manage ads on Facebook.Get the Webhook URL
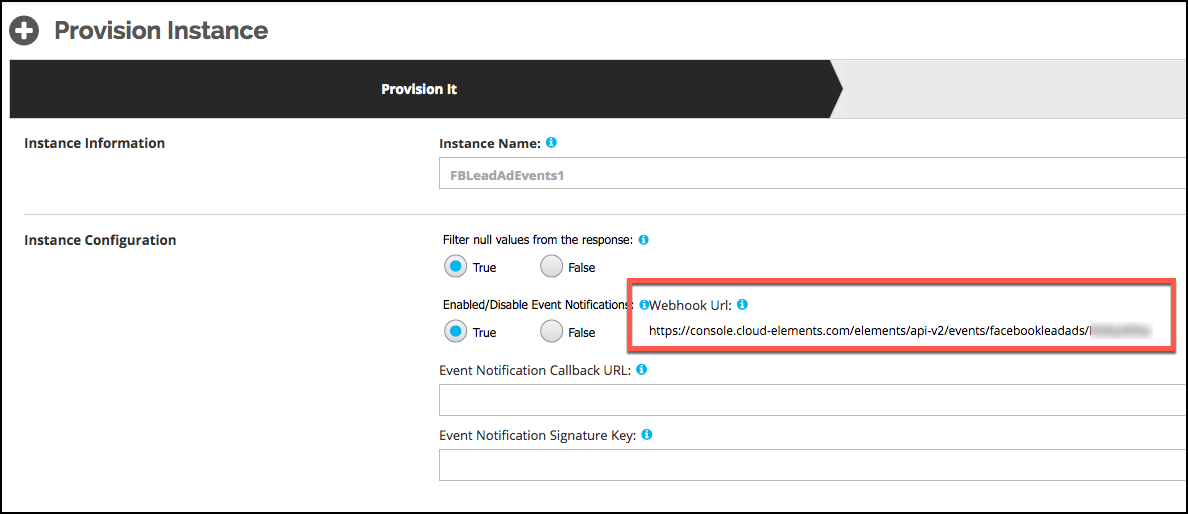
You need the Webhook URL which is dynamically created when you provision . To locate the Webhook URL, navigate to the Connector Instance in the user interface.
Event Endpoint Setup
To set up webhooks for Facebook Lead Ads:
- Log in to your Facebook Lead Ads developer account at https://developers.facebook.com/.
- Navigate to your Facebook App.
- Click Create App ID.
- On the Product Setup page, locate Webhooks, and then click Get Started.
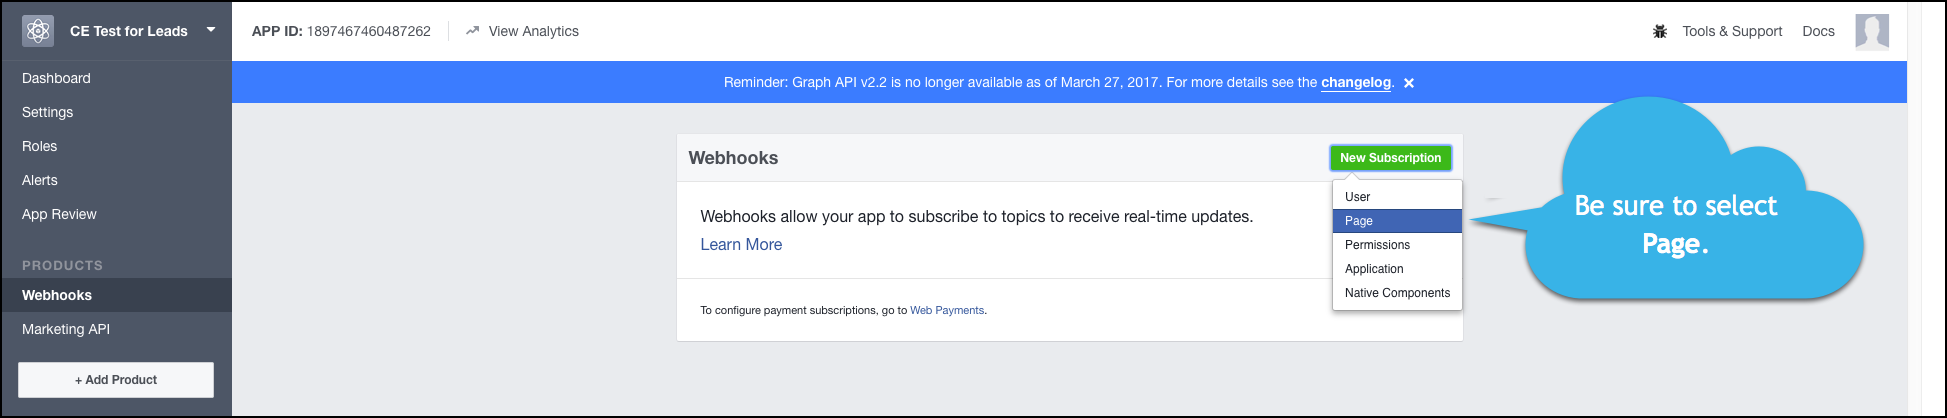
- Click New Subscription, and then select Page.
- On the New Page Subscription window, enter the following:
- Callback URL: Enter the
Webhook URLfrom the Connector Instance. See Get the Webhook URL. - Verify Token: Enter "CloudElements@123".
- Callback URL: Enter the
In Subscription Fields, select leadgen.
The New Page Subscription Window should look like this:
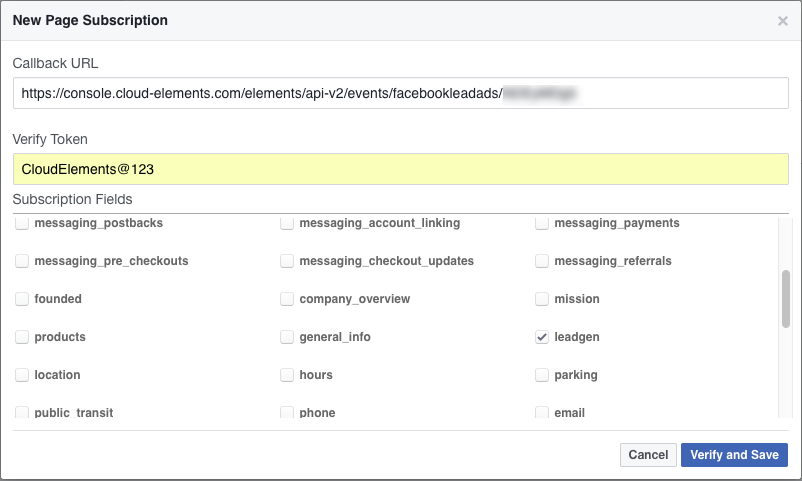
Click Verify and Save.


Set up the Connector Instance
To enable events, add these extra configurations to your instance JSON. Only event.notification.enabled is required.
"event.notification.enabled": "true",
"event.notification.callback.url": "<INSERT_YOUR_APPS_CALLBACK_URL>",
"event.notification.signature.key":"<INSERT_YOUR_APP_ID>"
instance JSON with polling events enabled:
{
  "element": {
    "key": "facebookleadads"
  },
  "providerData": {
    "code": "Code on Return the URL"
  },
  "configuration": {
    "oauth.api.key": "<INSERT_FACEBOOK_CLIENT_ID>",
    "oauth.api.secret": "<INSERT_FACEBOOK_CLIENT_SECRET>",
    "oauth.callback.url": "https://www.mycoolapp.com/auth",
    "oauth.scope": "<INSERT_FACEBOOK_LEVEL_OF_PERMISSION>" ,
    "event.notification.enabled": "true",
    "event.notification.callback.url": "<INSERT_YOUR_APPS_CALLBACK_URL>",
    "event.notification.signature.key":"<INSERT_YOUR_APP_ID>"
  },
  "tags": [
    "<INSERT_TAGS>"
  ],
  "name": "<INSERT_INSTANCE_NAME>"
}
Note: For webhooks, enter at least "manage_pages" for oauth.scope.
