Building transformations has become even simpler and faster on the new Common Resources V2 UI. To create a new Common Resource using the new UI, follow the next few steps.
- On Common Resource V2 UI, click on the Build New Common Resource button on the top right corner.

- Choose whether you want to build a new Common Resource using the interface or using JSON. Click Continue.
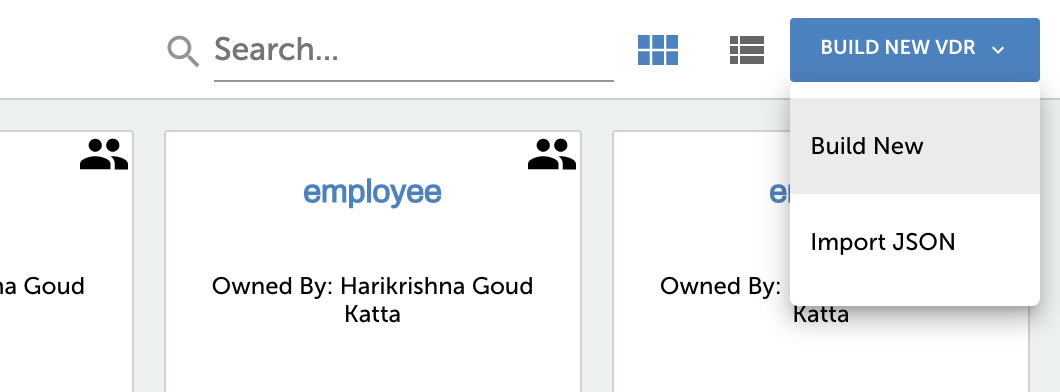
- If you want to build a common resource using the interface, click 'Build New' and proceed to step 3.
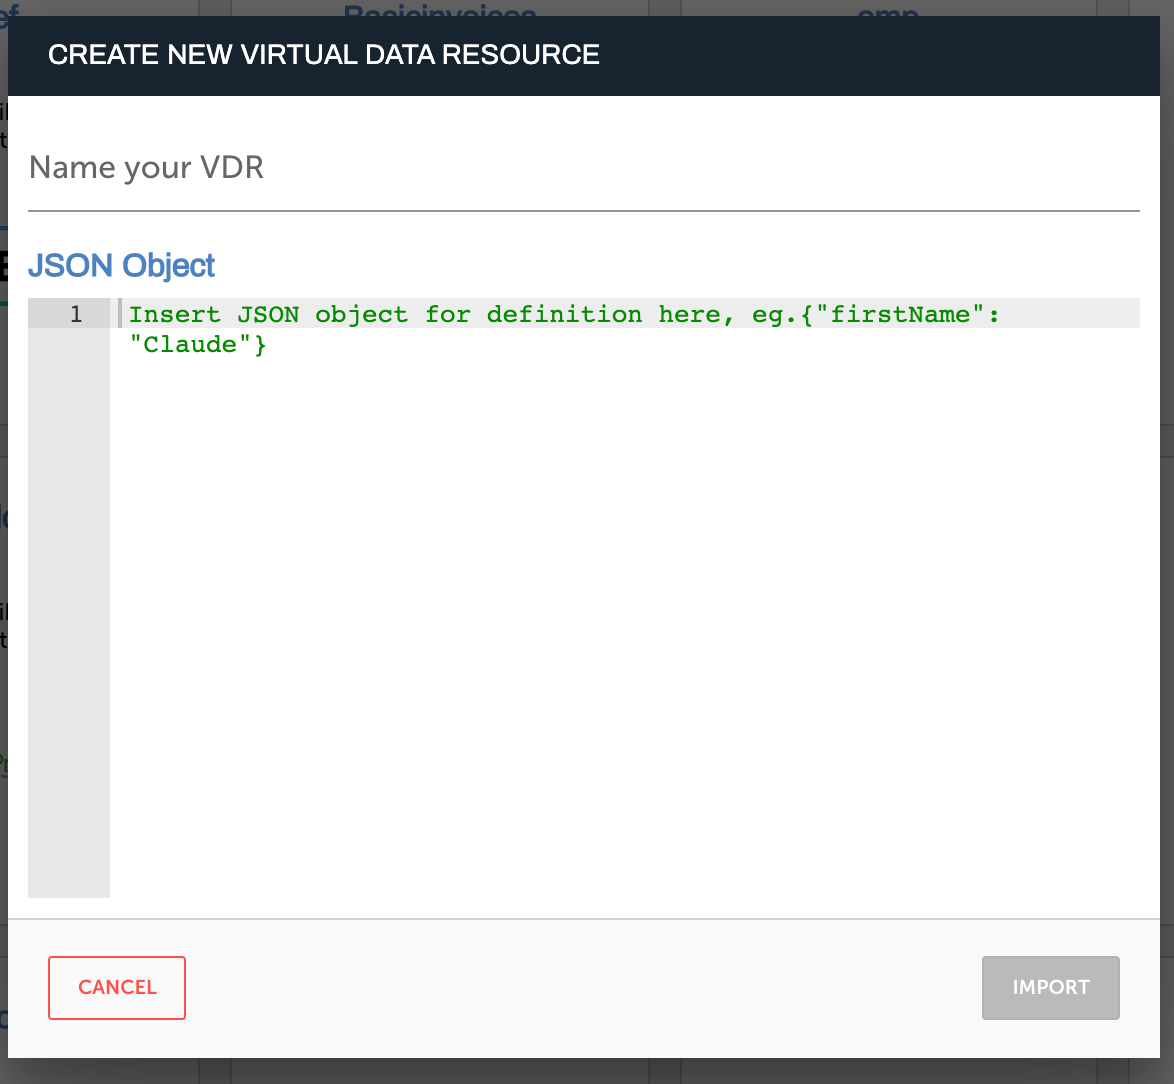
- If you want to build a VDR using JSON import, click 'Import JSON' option. Type your VDR name and enter the JSON object in the editor. Click Import to import the JSON.
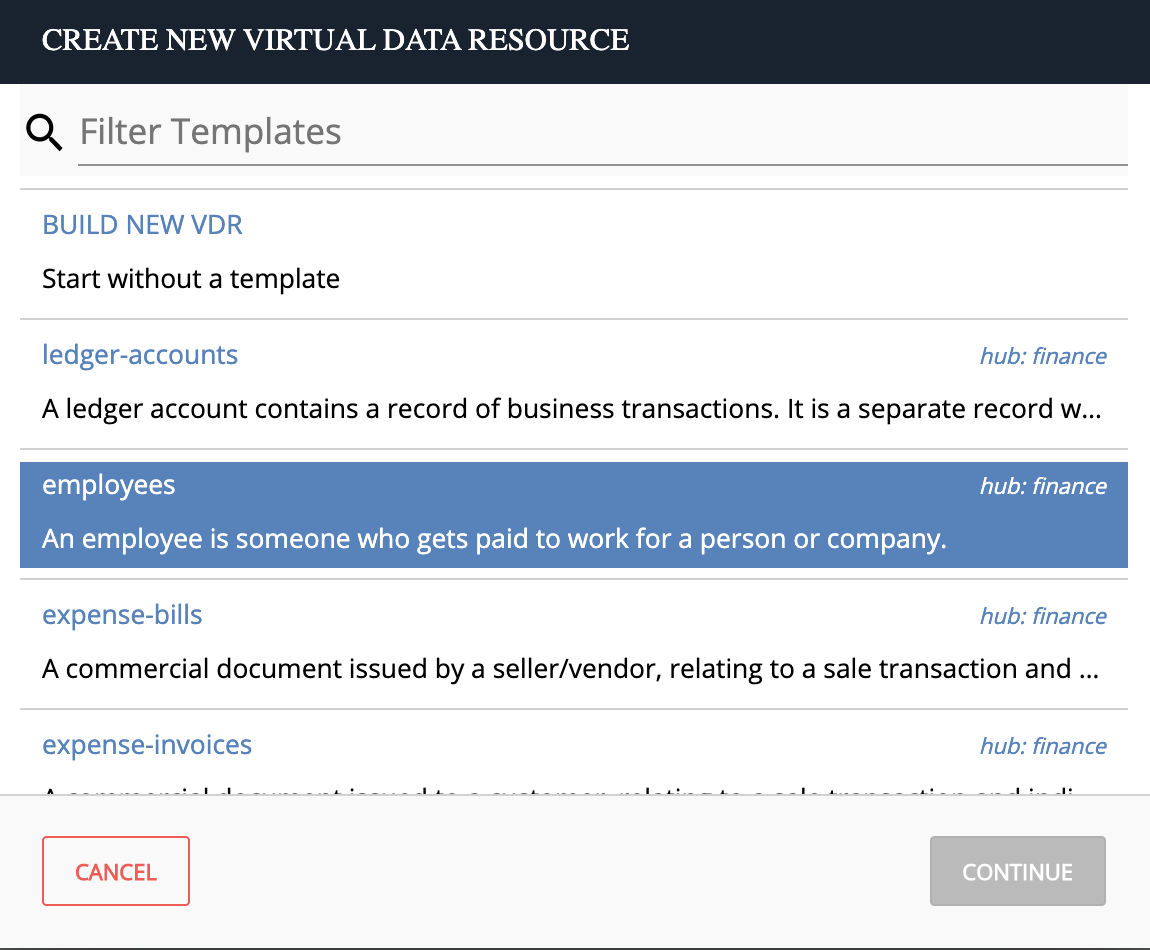
- Using our interface, you can build a common resource by either choosing a template or from scratch.
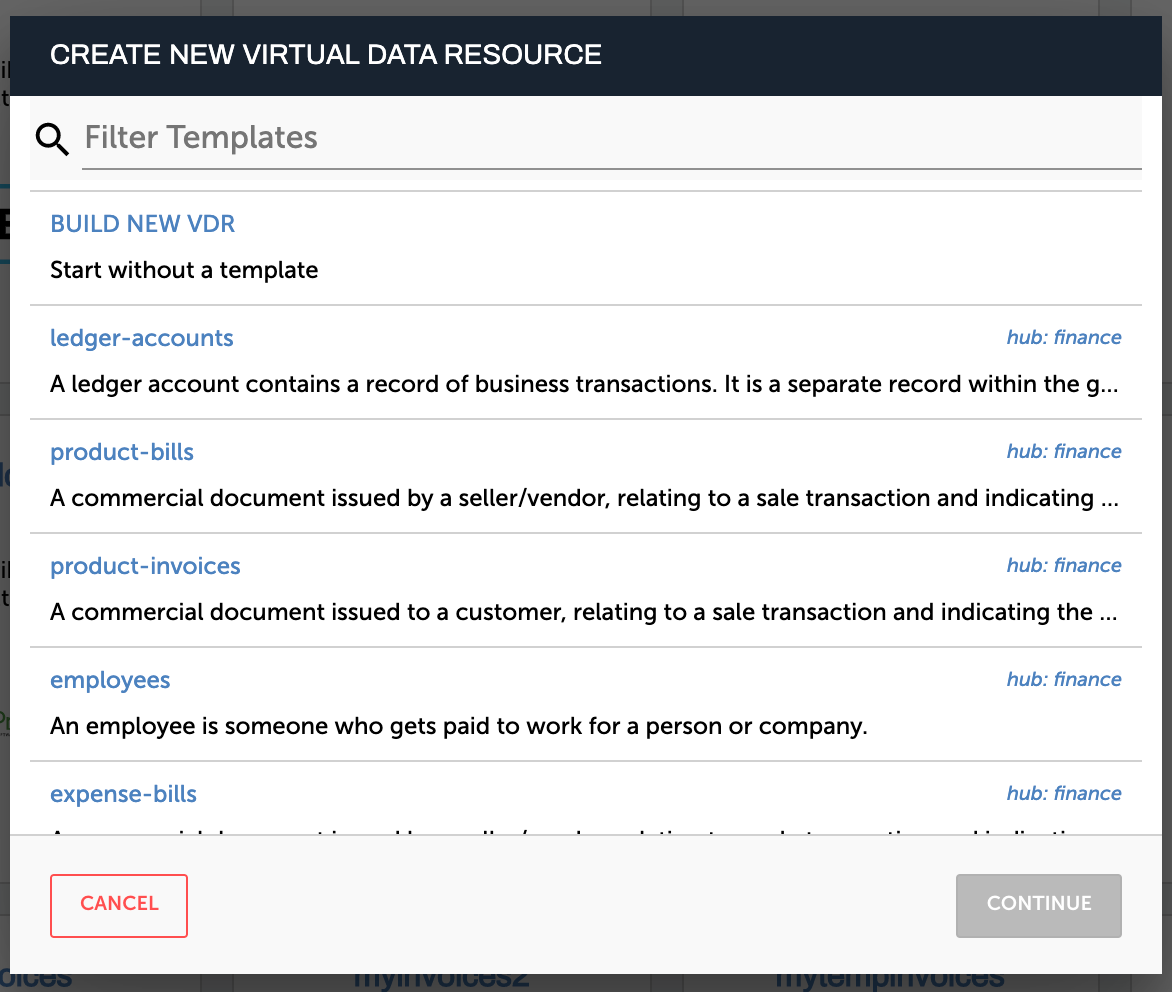
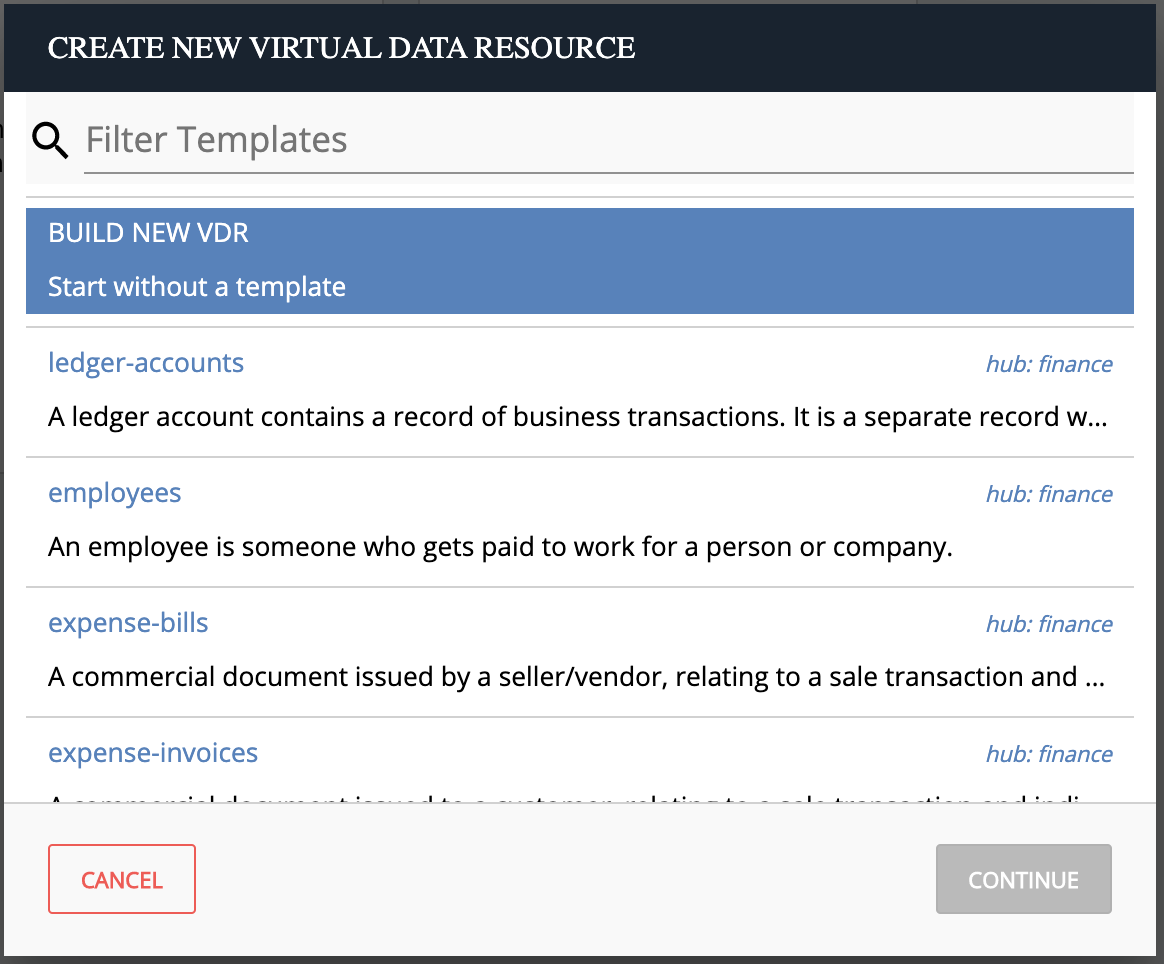
- If you want to start building a common resource from scratch, click Build New common resource.
- If you would like to build a common resource using one of our templates, you can search for a template and choose the one most suited to your use.


Both methods are discussed in detail further in this article.
Without a Template
To build a common resource without a template, follow the steps below.
- Continuing from our previously mentioned steps, Click Build New common resource as mentioned above.
- Click Continue.
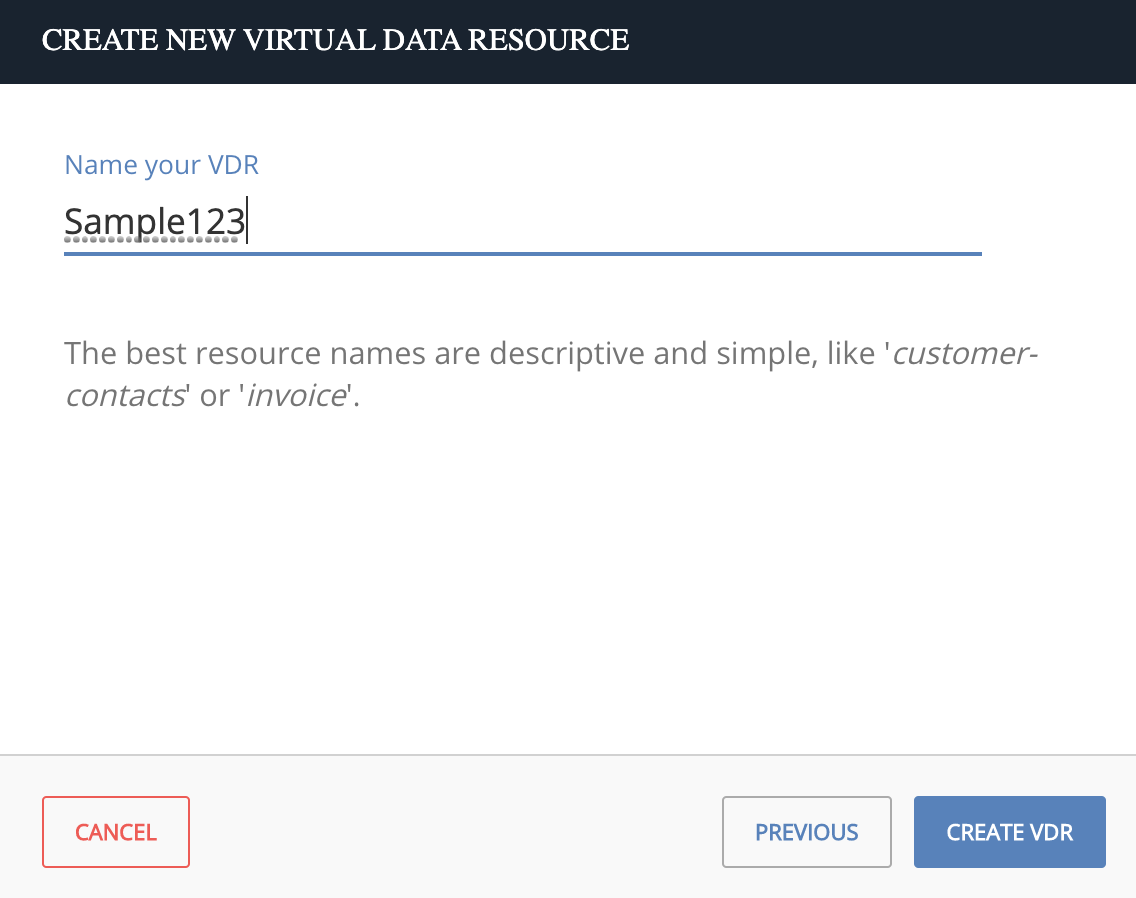
- Enter a name for your VDR and click Create VDR.
- On the screen that appears next, add as many fields as you want for the transformation.
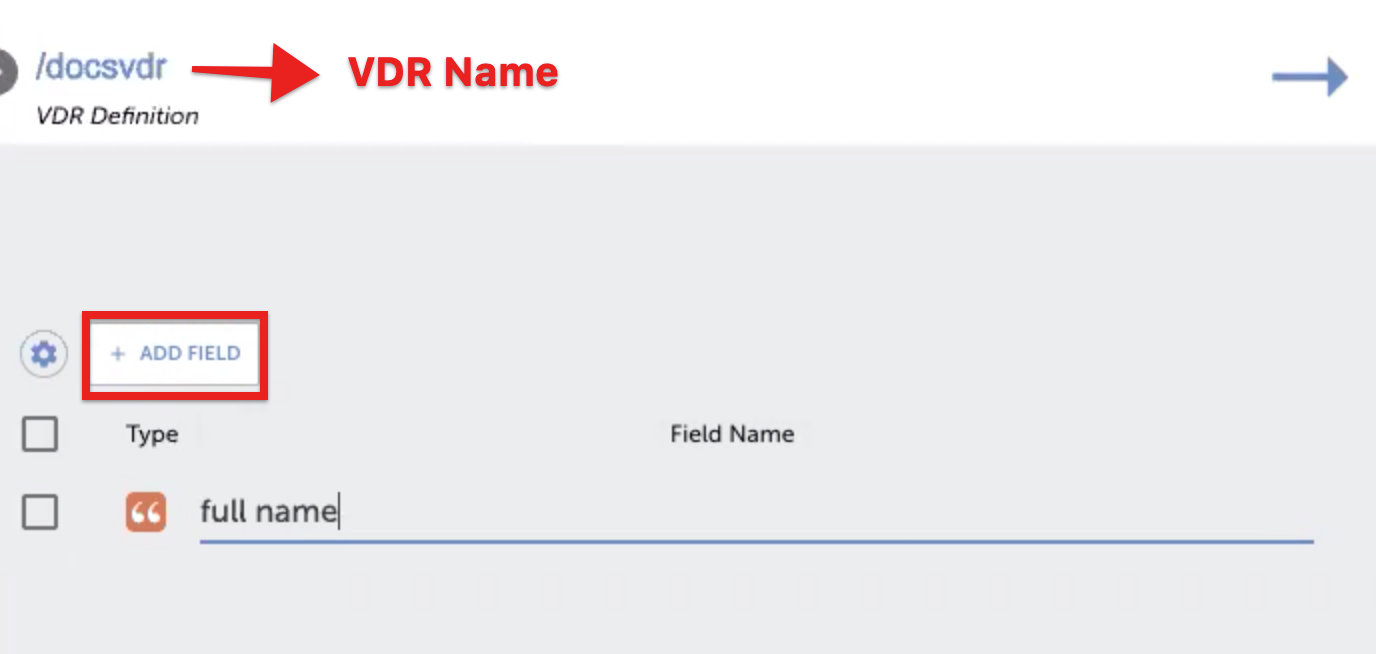
- Select a field for your mapping and enter a name for it.
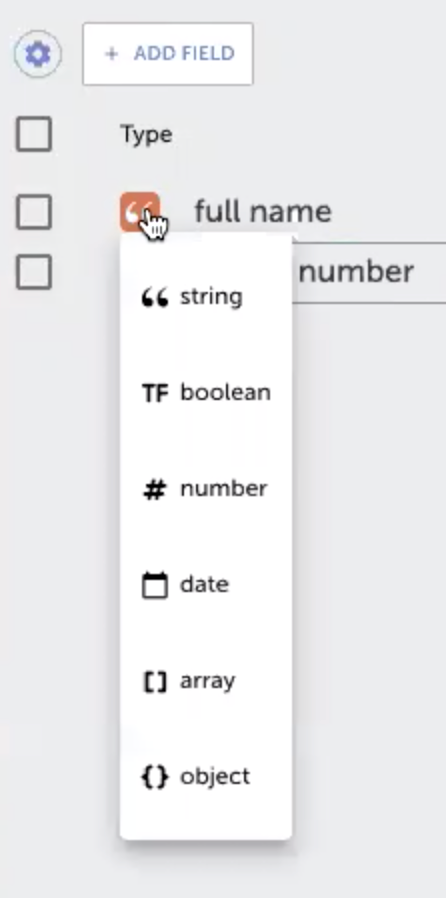
- To select the type of the data you added in the field, click on the icon and choose from the list that appears.
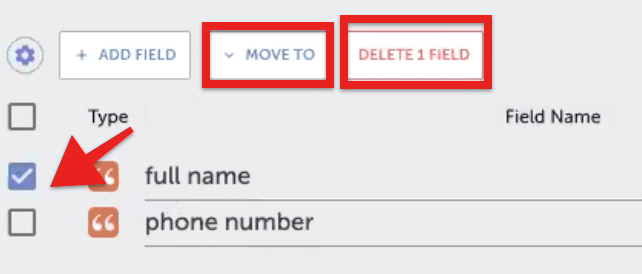
- For more actions pertaining to a particular field, check the box.
- Click on the settings icon to toggle headers, per your convenience.

- Click Save on the top right corner of your page.
- Before you can transform fields, you need to map the fields for each element instance to a Virtual Data Resource. Click Add New Transformation.
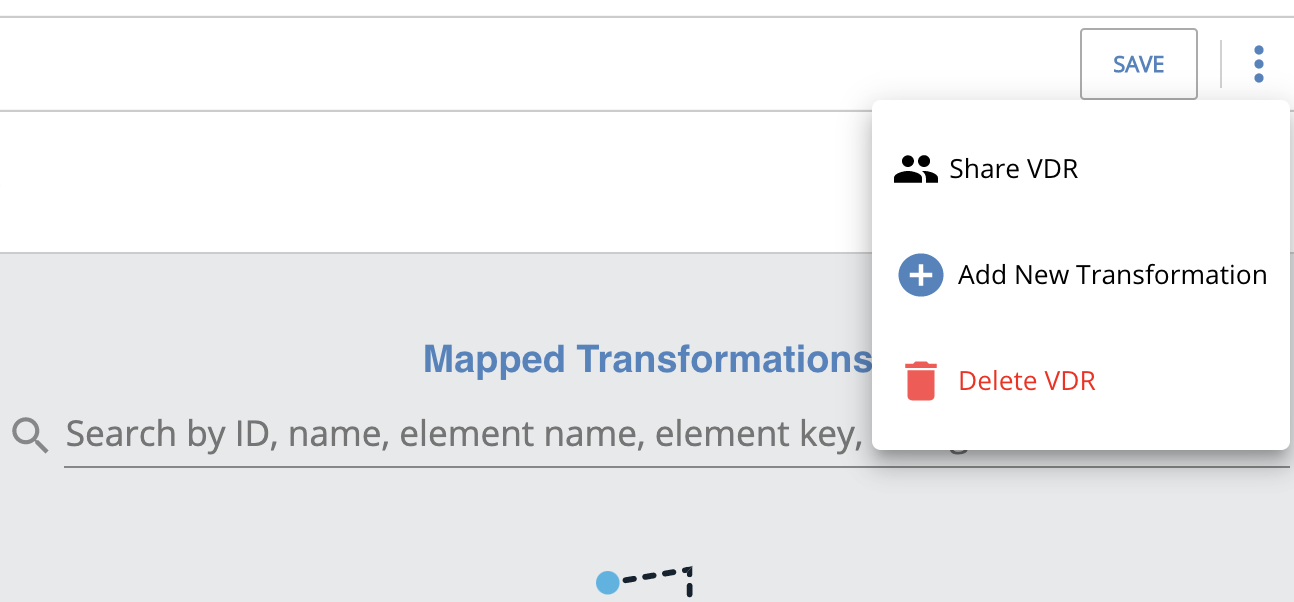
- The console that pops up displays elements along with their respective instances. Select the element instance you want to work with. Click Save & Next.
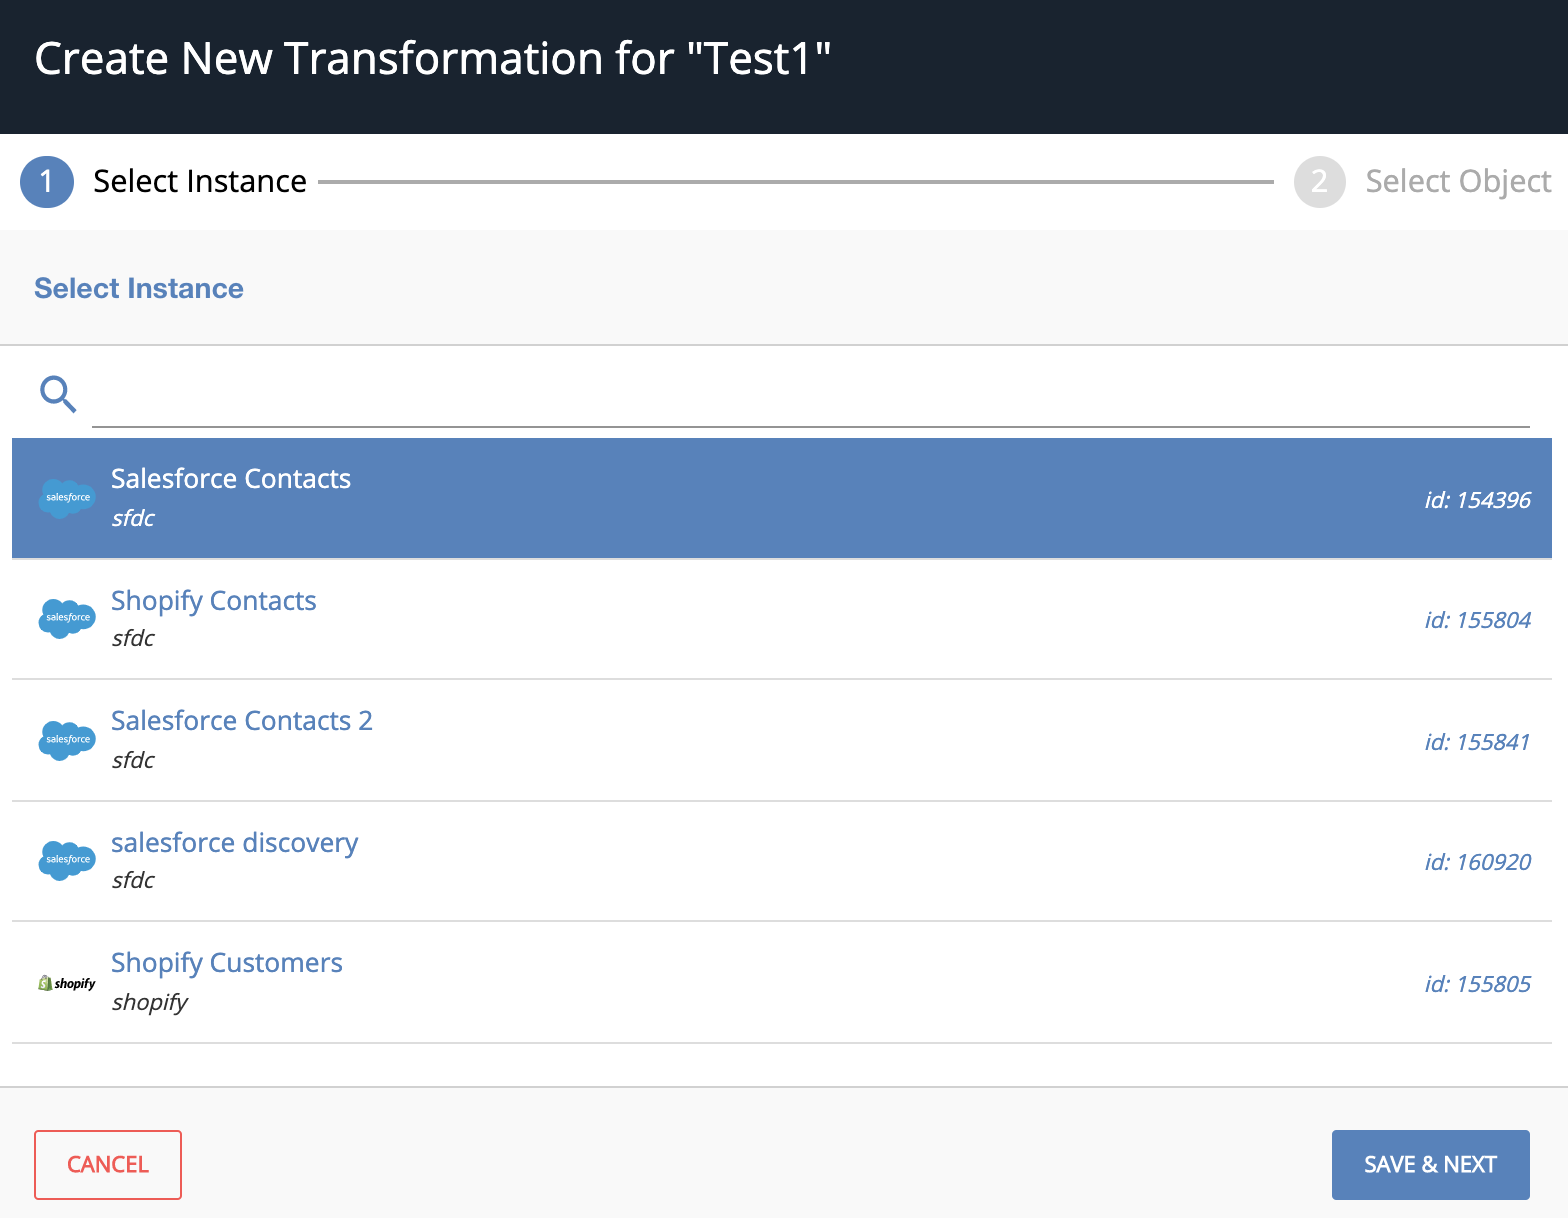
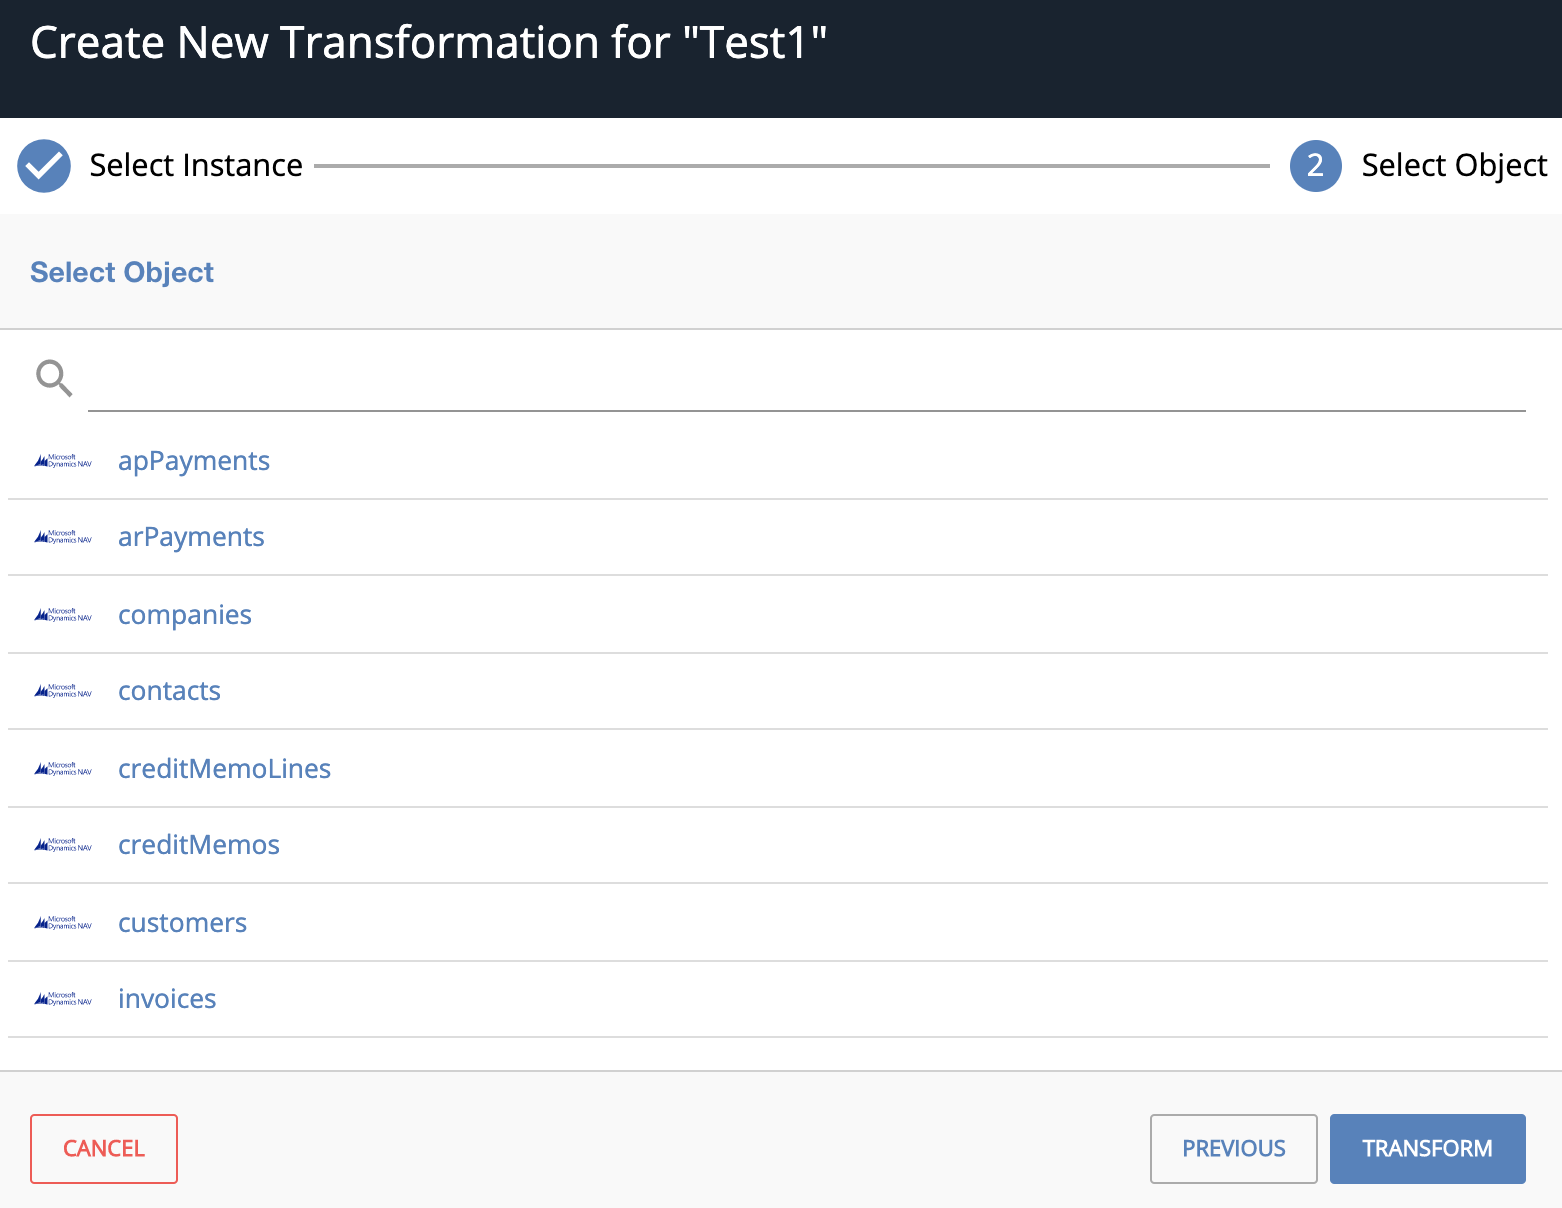
- After selecting the element instance, select the object you would like to map. Click Transform.
- Select a field for your mapping and enter a name for it.
- Choose a data type for the field.
- Optionally add a Display Name to more clearly identify a field with how it appears in an API provider's UI.
- Select the corresponding field on the right to map to the new field.
- Continue adding resources until you finish, and then click Try It Out.
- You have an option to either directly execute your Virtual Data Resource or save it first.
 Alternatively, you could also click Save on the top right, to save your Virtual Data Resource.


With Automapper
If you would like to build a common resource using one of our templates, follow the steps shown below.
- On Common Resource V2 UI, click on the Build New Common Resource button on the top right corner.
- Choose whether you want to build a new Common Resource using the interface or using JSON. Click Continue.
- If you want to build a common resource using the interface, click 'Build New' and proceed to step 3.
- If you want to build a VDR using JSON import, click 'Import JSON' option. Type your VDR name and enter the JSON object in the editor. Click Import to import the JSON.
- To build a common resource using one of our templates, you can search for a template and choose the one most suited to your use.
- Click Continue.
- On the next screen, you will see all your connector instances. These are grouped into two sections - Suggestions and All Instances.
The instances grouped under Suggestions are instances that contain objects that are a close match to the template you selected.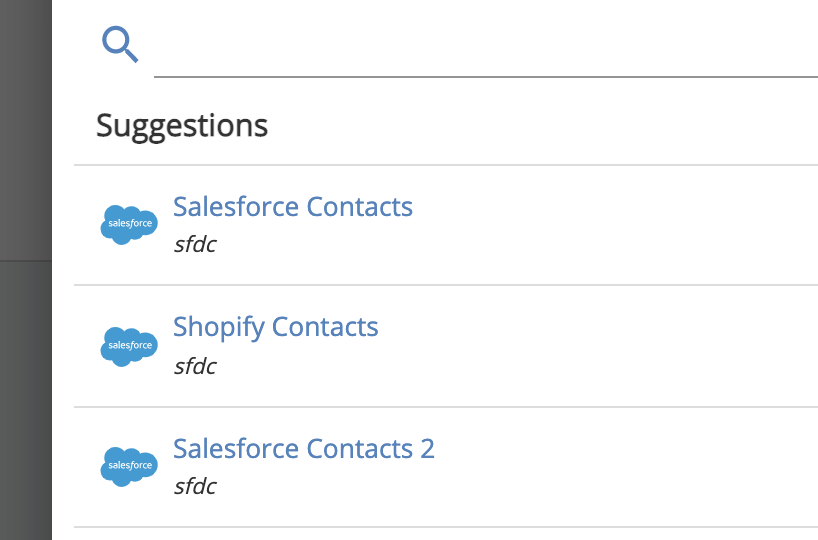 And the All Instances section groups all of your available instances together.
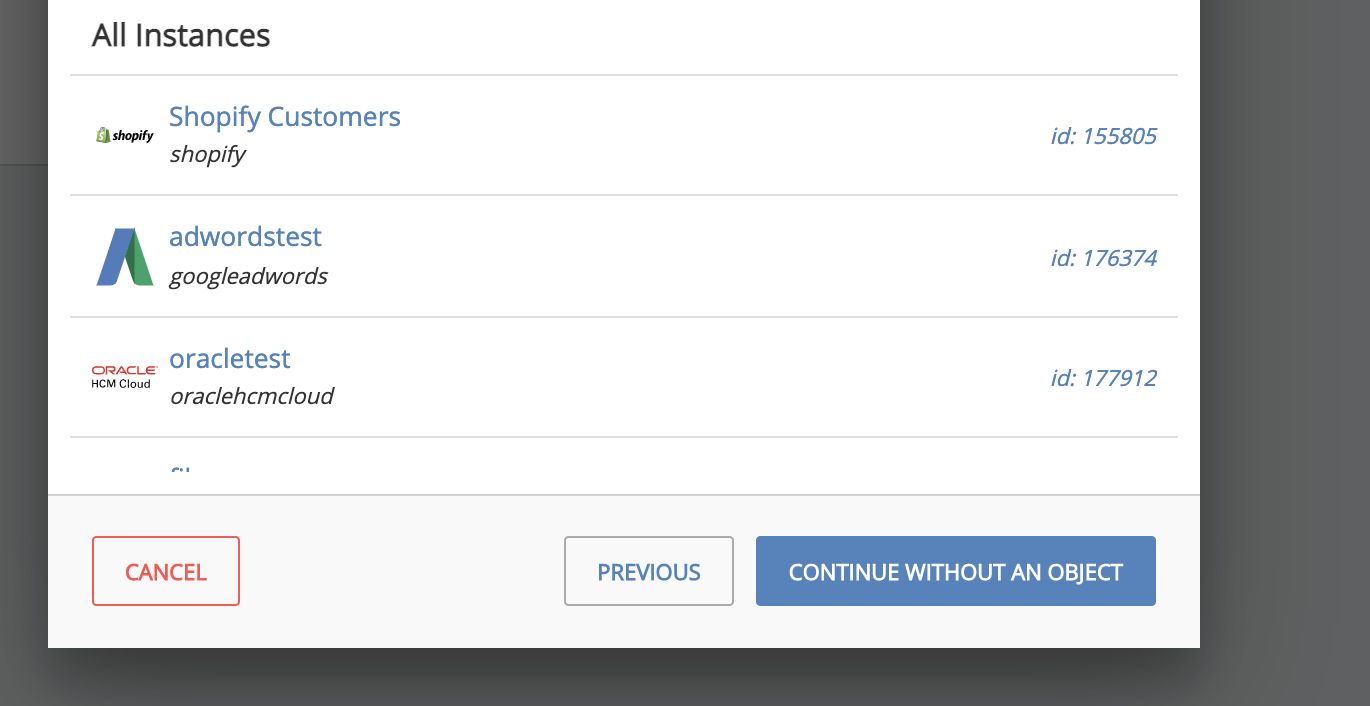
- Select the instance most appropriate for your use and click Continue.
- After selecting the connector instance, select an object from the list of objects supported by the connector. Similar to the instances, objects too are separated into two sections - the closest match to your selected template grouped under Suggestions while all the objects available for the connector are grouped under All objects.
- Click on Continue.
- Enter a name for your VDR and click Create VDR.
- Usually a screen as shown below appears and you'd require to manually add field names to map them with the object definitions on your template.
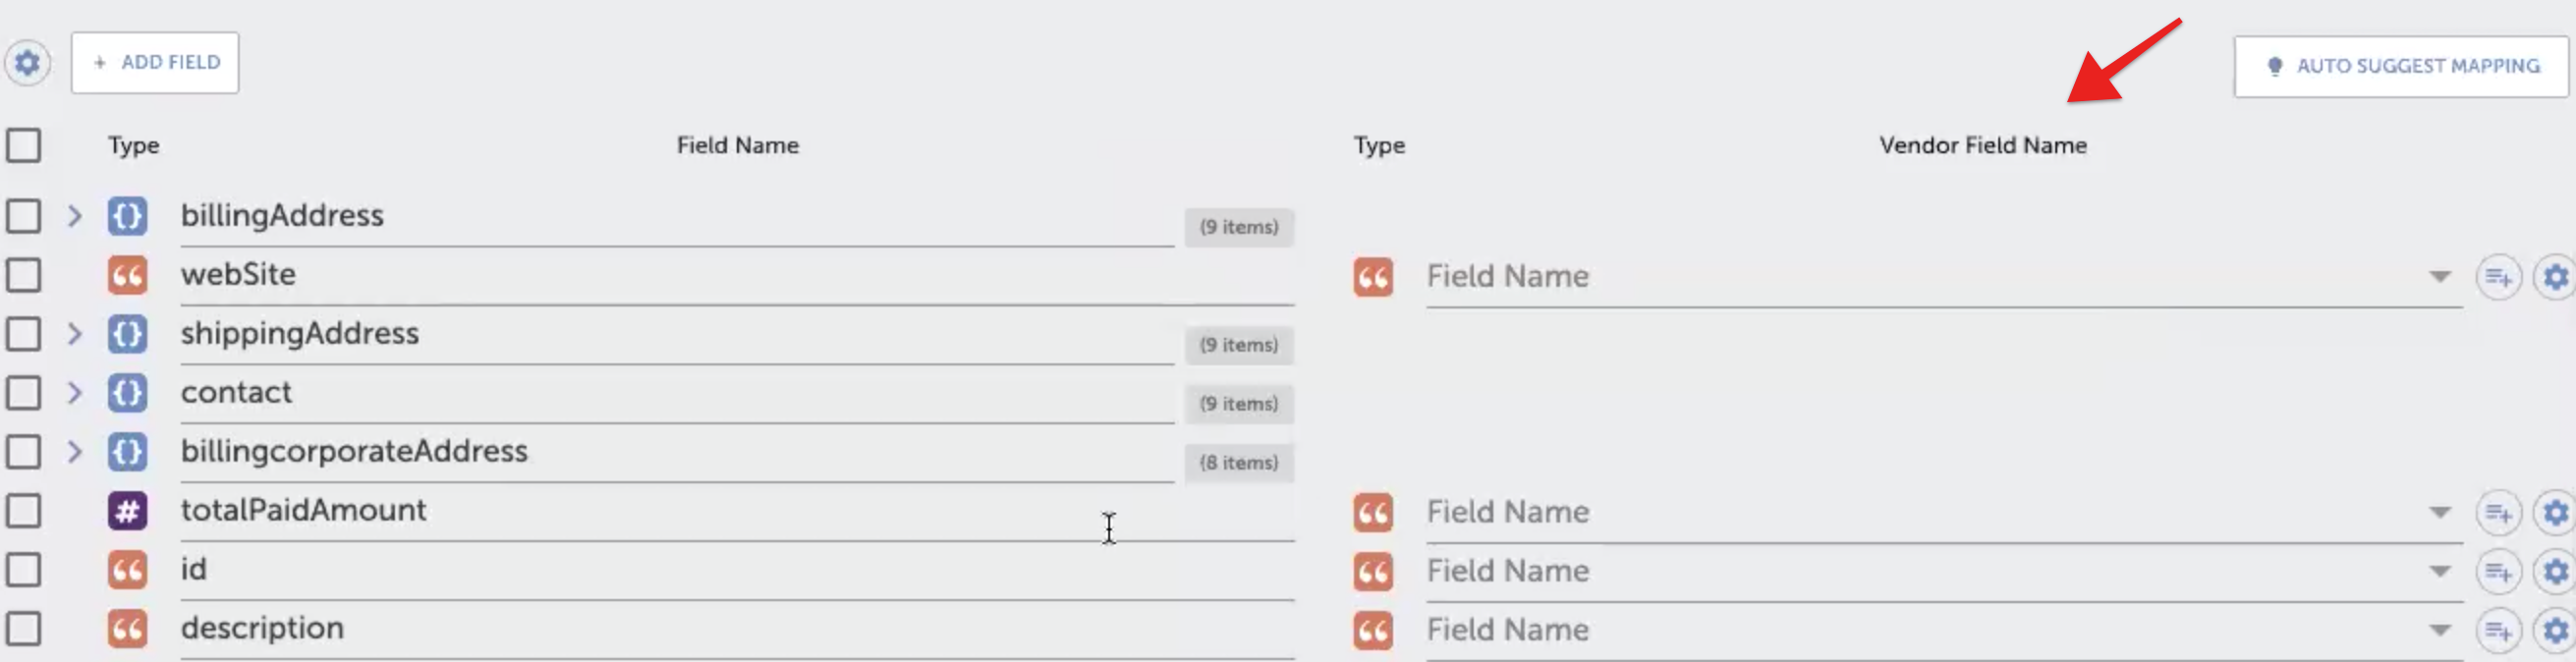 But with the Automapper, you have the option to have these fields populated automatically.
 - You will now see automatic mappings between the object definitions on your template and the transformation fields. You may edit them as you please.
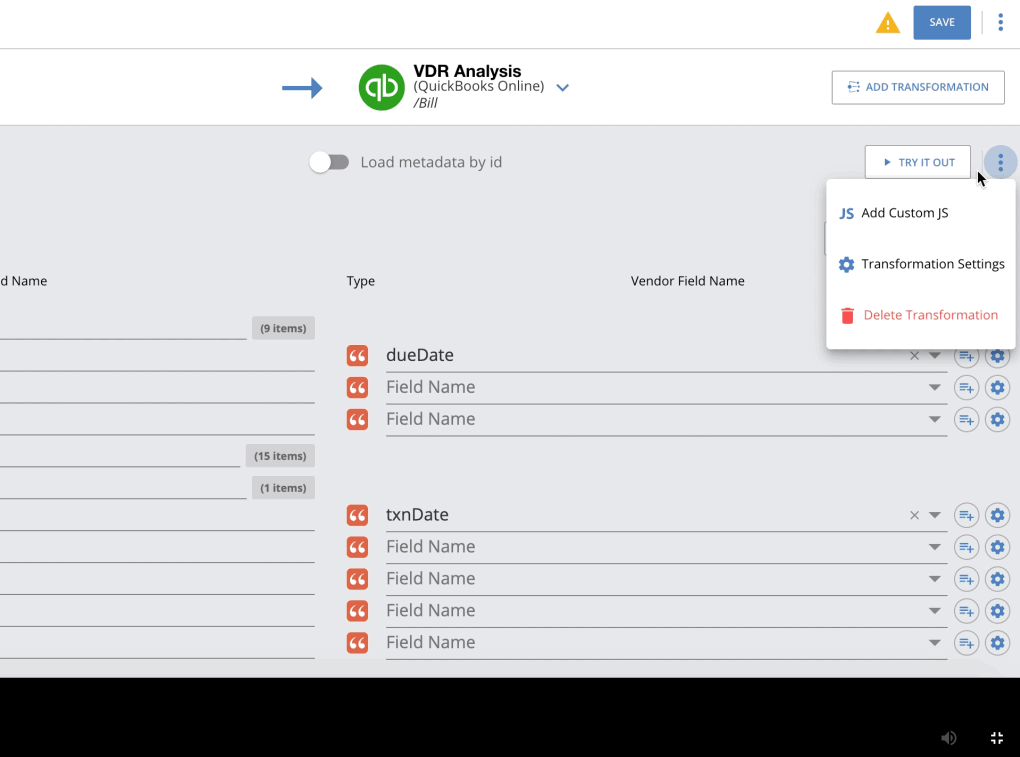
- You can click on the three dots next to the Try It Out button to perform more actions.
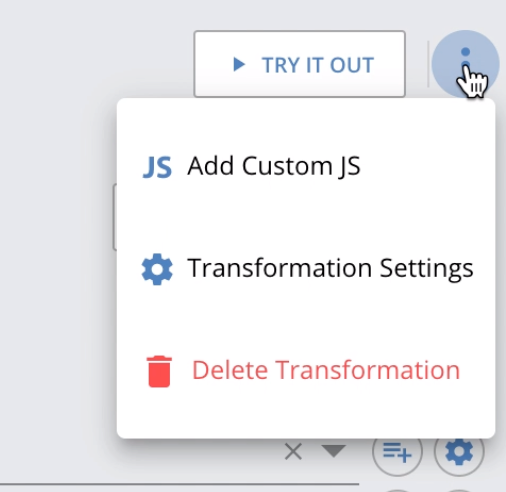 Click on Add Custom JS to enhance your transformation using customized JS. For some connectors we display comments in this section, to make it more convenient for you in scenarios where the same Common Resource definitions can be mapped to different fields based on some conditions.
Click on Transformation Settings to apply special automatic features. Transformation settings are also known as advanced settings. There are five types of automated settings for user convenience: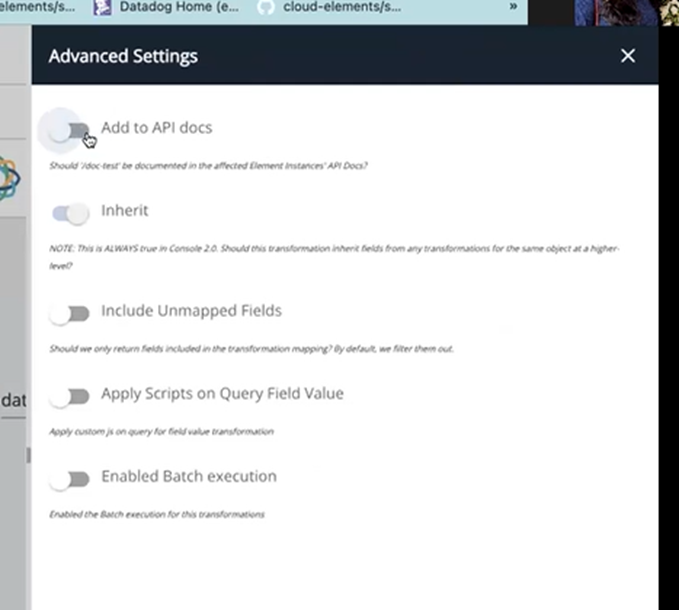 Add to API Docs
Enabling this will update the transformation endpoints in the API Documentation of the element. To check if this feature is applied, go to My Resources or open the API Documentation of the element.
Inherit
This feature is enabled by default, It inherits fields from any transformations for the same object at a higher level.
Include Unmapped Fields
By default, unmapped transformations are filtered and are not included in the transformation mapping. Enabling this feature will include unmapped fields in the transformation mapping.
Note: For Connectors where individual fields are queried from the tables, the unmapped fields are not available in the raw vendor response body as well.
Apply Scripts on Query Field Value
This enables you to enter and apply custom JavaScript on the query field value (isWhere) transformations.
To apply the isWhere clause, Paste the following JavaScript:


 But with the Automapper, you have the option to have these fields populated automatically.
 Click on Add Custom JS to enhance your transformation using customized JS. For some connectors we display comments in this section, to make it more convenient for you in scenarios where the same Common Resource definitions can be mapped to different fields based on some conditions.
 Add to API Docs
//Start Here.
if (isWhere) {
   //Get list Of query field objects for originalQuery and transformedQuery.
  const originalField = originalObject.where[0];
  const transformedField = transformedObject.where[0];
  //If list contains one query fields then
  if (originalField.attribute == 'isActive' && originalField.value === 'false') {
    transformedObject.where = "Status = ‘inactive’ OR Status = ‘suspended’";
  } else if (originalField.attribute == 'isActive' && originalField.value === 'true'){
    transformedObject.where = "Status='active'";
  }
} else {
   //Body transform (either request or response body transformation)
}
done(transformedObject);
Enabled Batch Execution
You can enable batch execution for common resources in order to reduce the number of server calls made, enhancing the speed and performance of your use case.
To enable batch execution for common resources:
- Access/Open/Create a common resource.
- Click the Options button
 next to Try It Out. From the drop-down, select Transformation Settings.
Note: Transformation settings is available only when one or more vendor fields names are entered. - A pane on the right side with a list of settings appears.
Note: This feature is specific to the organizations. Some common resources may not have an option to change the advanced settings. - Set the ‘Enabled Batch execution’ toggle to ON.
Note: On enabling you will notice that by default this option is set on AUTO where the server calculates the batch size or the customers can give a value based on the connector page size.
 next to Try It Out. From the drop-down, select Transformation Settings.
- The fields to be mapped under different conditions are displayed in the comments. You would need to map those fields to Common Resource definitions manually as you would know the conditions being used. Click on the Save button to save the transformation.

The Common Resource Automapper saves time and effort for the user by automatically suggesting templates. You would not require to manually add each and every field from scratch and also have the flexibility to make any enhancements or changes depending on your requirements.
