SAP Open Connectors supports events via polling or webhooks depending on the API provider. For more information about our Events framework, see Events Overview.
Supported Events and Resources
SAP Open Connectors supports polling events and webhooks for . After receiving an event, SAP Open Connectors standardizes the payload and sends an event to the configured callback URL of your authenticated connector instance.
Polling
In order to enable polling, add these extra configurations to your instance JSON:
"event.notification.enabled": "true",
"event.notification.callback.url": "<INSERT_YOUR_APPS_CALLBACK_URL>",
"event.poller.configuration": "<SEE_BELOW>"
instance JSON with polling events enabled:
{
  "element": {
    "key": "zendesk"
  },
  "providerData": {
    "code": "Code on Return the URL"
  },
  "configuration": {
    "oauth.api.key": "<INSERT_ZENDESK_UNIQUE_IDENTIFIER>",
    "oauth.api.secret": "<INSERT_ZENDESK_CLIENT_SECRET>",
    "oauth.callback.url": "https://www.my_cool_app.com",
    "zendesk.subdomain": "<INSERT_ZENDESK_SUB_DOMAIN>",
    "event.notification.enabled": "true",
    "event.notification.callback.url": "<INSERT_YOUR_APPS_CALLBACK_URL>",
    "event.poller.configuration": {
      "users": {
        "url": "/hubs/helpdesk/users",
        "idField": "id",
        "pageSize": 100,
        "datesConfiguration": {
          "updatedDateField": "updated_at",
          "updatedDateFormat": "yyyy-MM-dd'T'HH:mm:ss'Z'",
          "createdDateField": "created_at",
          "createdDateFormat": "yyyy-MM-dd'T'HH:mm:ss'Z'"
        }
      }
    }
  },
  "tags": [
    "<INSERT_TAGS>"
  ],
  "name": "<INSERT_INSTANCE_NAME>"
}
Webhooks
After you create an instance with webhooks enabled, your app will receive event notifications from Zendesk based on our default settings
Customization is an option based on your specific needs. See customization instructions below.
Webhook JSON
{
  "element": {
    "key": "zendesk"
  },
  "providerData": {
    "code": "Code on Return the URL"
  },
  "configuration": {
    "oauth.api.key": "<INSERT_ZENDESK_UNIQUE_IDENTIFIER>",
    "oauth.api.secret": "<INSERT_ZENDESK_CLIENT_SECRET>",
    "oauth.callback.url": "https://www.my_cool_app.com",
    "zendesk.subdomain": "<INSERT_ZENDESK_SUB_DOMAIN>",
    "event.notification.enabled": "true",
    "event.notification.callback.url": "<INSERT_YOUR_APPS_CALLBACK_URL>"
  },
  "tags": [
    "<INSERT_TAGS>"
  ],
  "name": "<INSERT_INSTANCE_NAME>"
}
NOTE: To begin all changes to tickets, your app will be notified.
You have the option to limit that scope according to your needs.
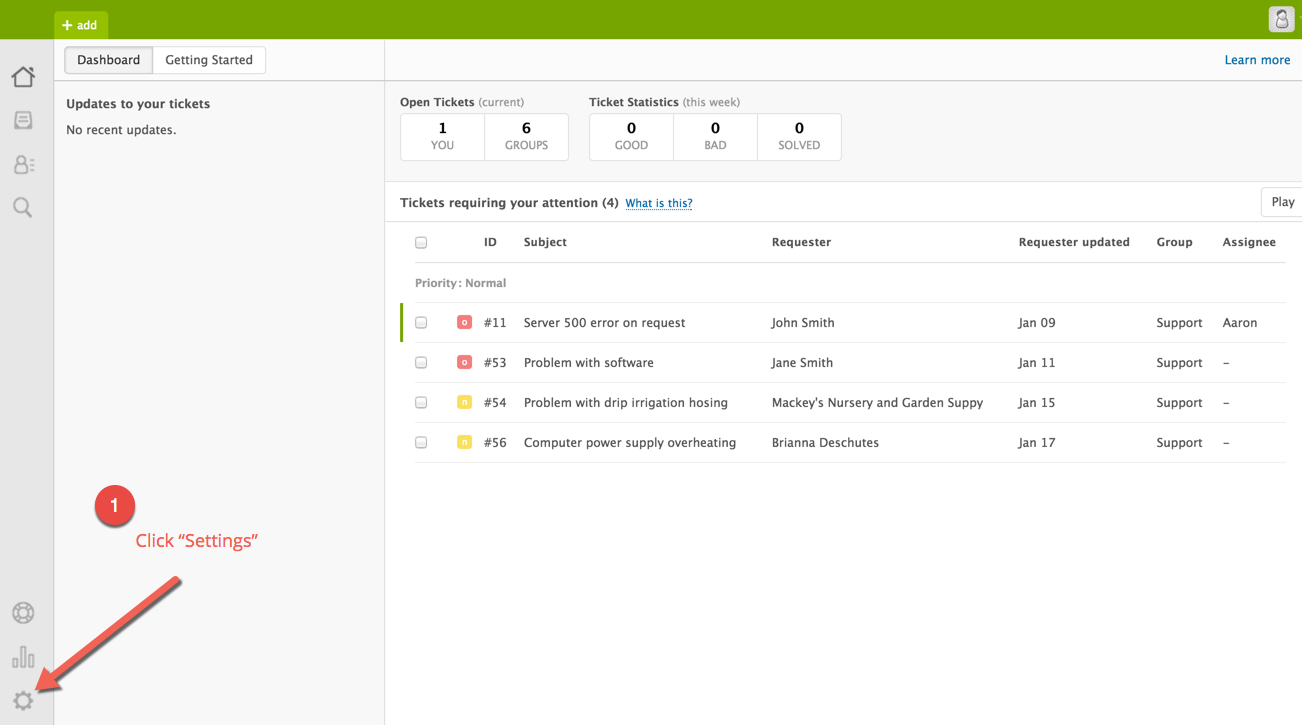
Login to your Zendesk account and click “Settings”
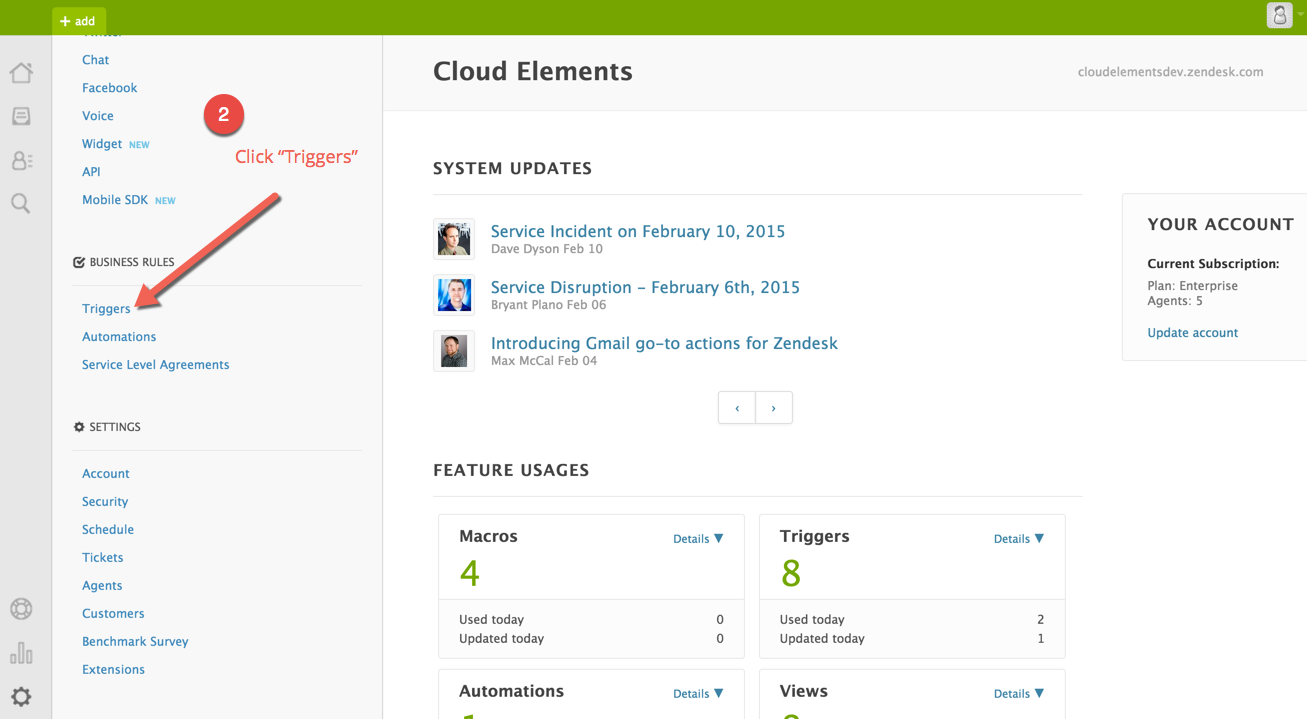
Scroll and find “Triggers” and click to select
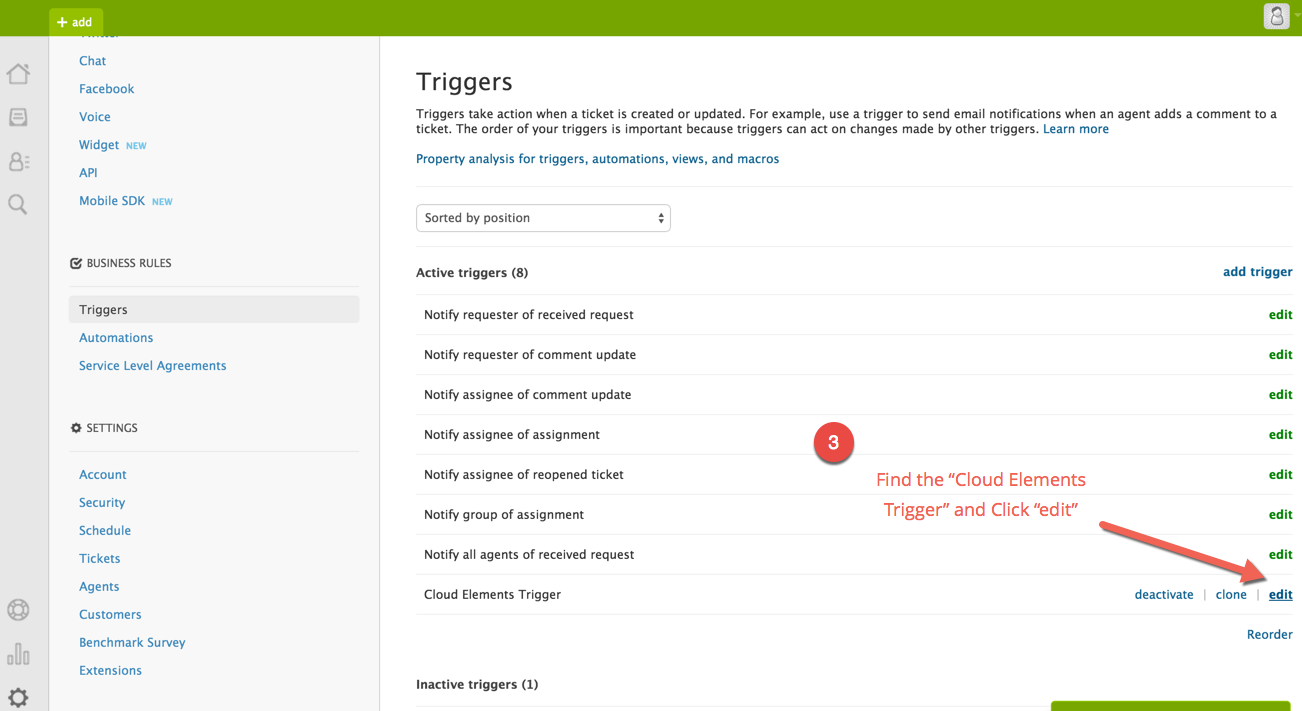
Find the Cloud Elements Trigger and click “edit”
NOTE: the following steps are OPTIONAL. Can Change the name of the Trigger
Can Change the Conditions of the Trigger

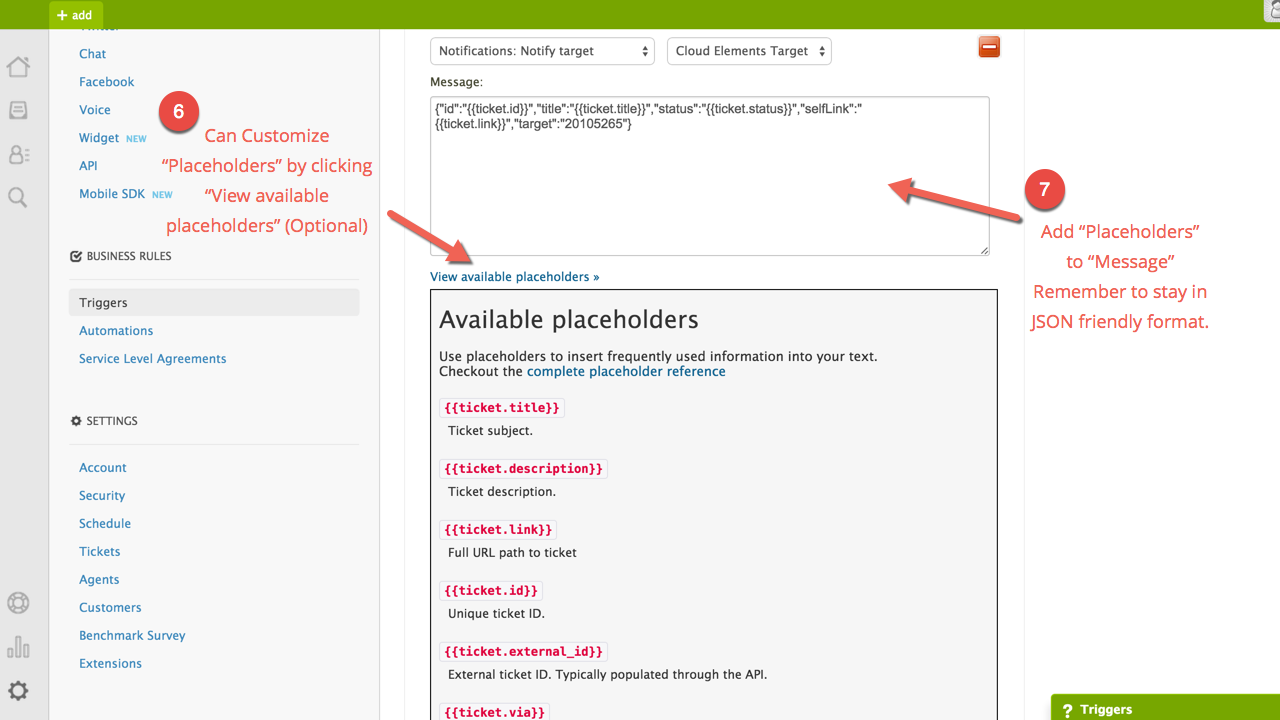
IMPORTANT: Please do not remove the target field, events will not function if removed.
Events rely on the target remaining the same and Message field conforming to a JSON friendly format.
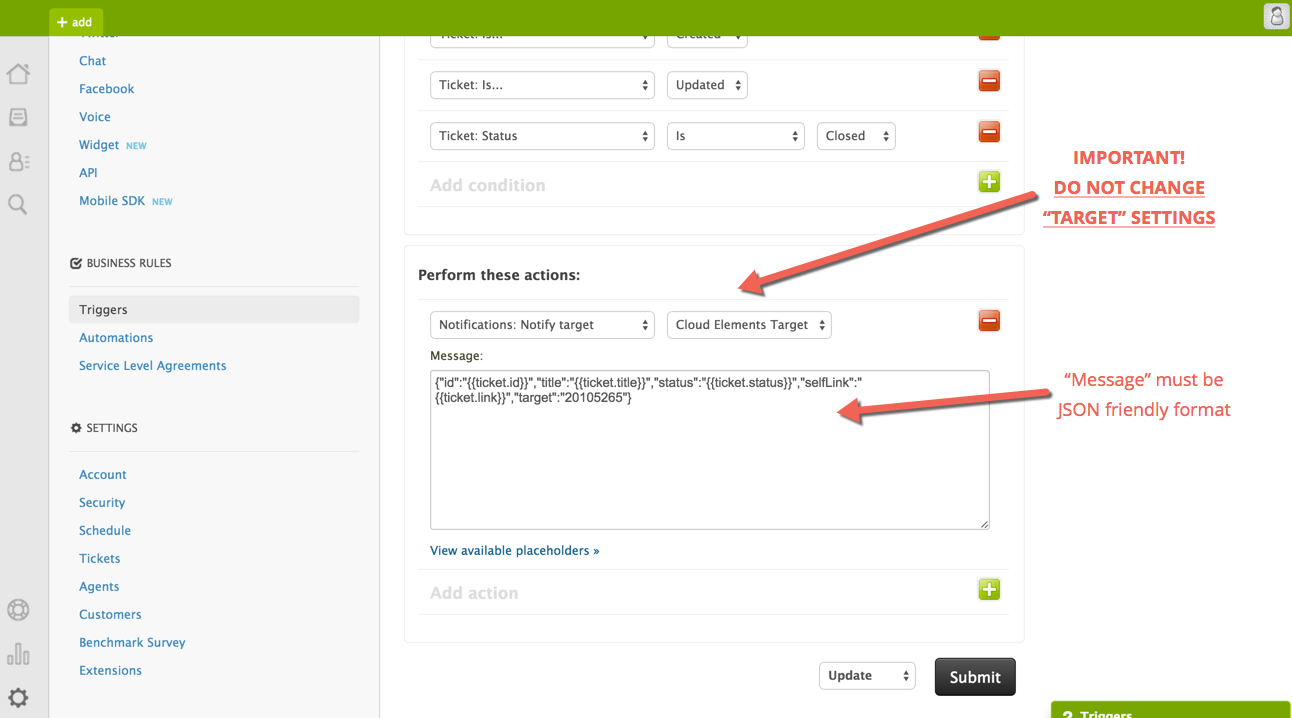
Feel free to add any of the Zendesk placeholders in your Message body, just remember to keep it JSON friendly.
Click on the View available placeholders
Add “Placeholders” to “Message” – Remember to keep in JSON friendly format.