Overview
In order to create an instance of the Microsoft Dynamics 365 Finance and Operations connector, you must have the following:
- A Microsoft Azure Active Directory account
- A Microsoft Dynamics 365 Finance and Operations account
Note: the Microsoft Dynamics 365 Finance and Operations trial does not provide API access. See Microsoft Dynamics 365 Finance and Operations Authenticate a Connector for additional information.
- A web application registered with both Azure Active Directory and Dynamics 365 Finance and Operations
Registering a Web Application with Azure Active Directory
To register a new web application with Azure Active Directory, follow these steps:
- In a web browser, navigate to the Azure Portal and sign in using your Azure Active Directory credentials.
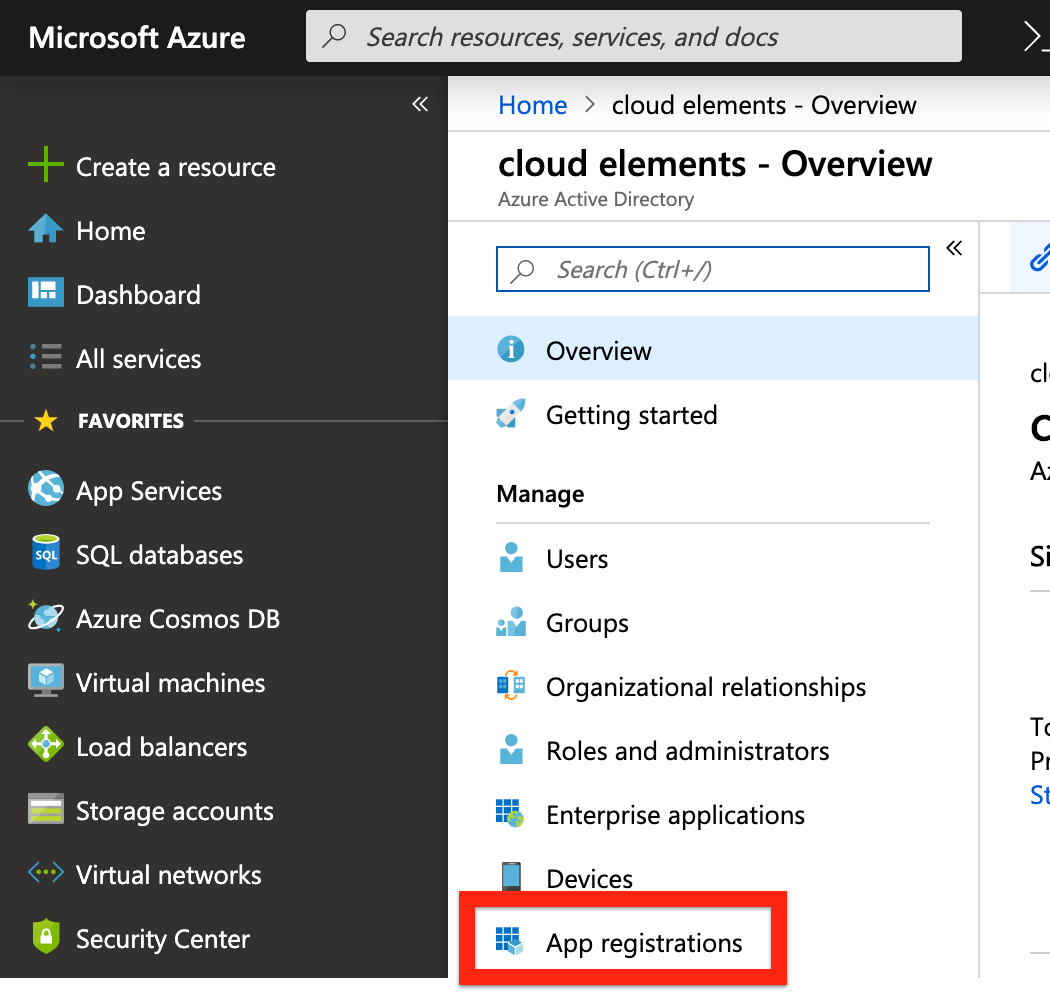
- From the left-hand navigation toolbar, select Azure Active Directory and then select App registrations.
- Select New registration.

- On the Register an application screen, enter the name and select the supported account types for your app.
- In the Redirect URI (optional) field, enter
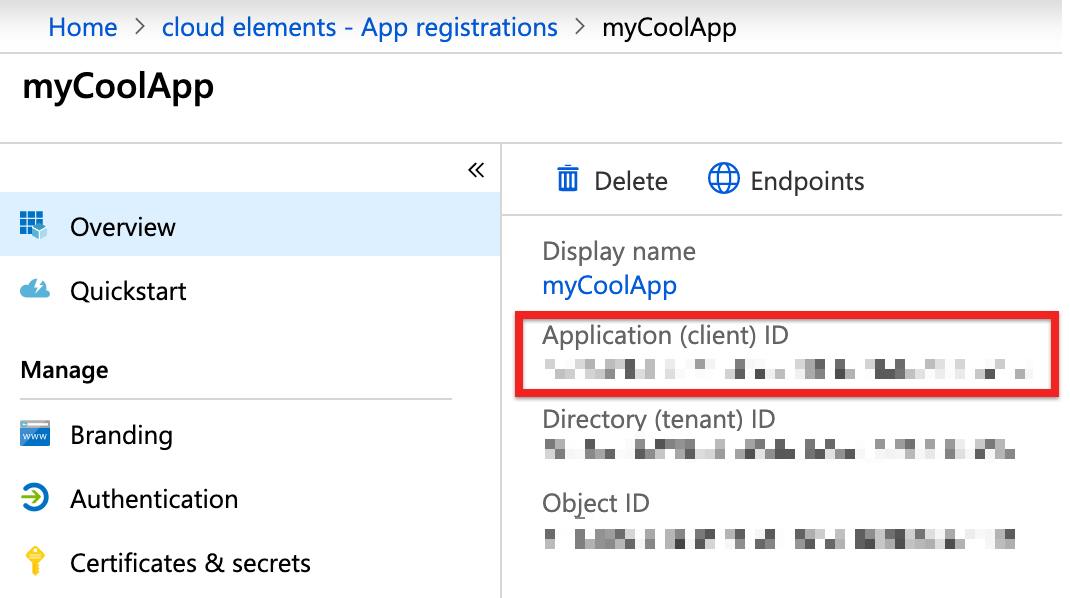
https://auth.cloudelements.io/oauthand then click Register. For more information on the application registration process, see Microsoft's documentation. - After registering your new application, record the Application (client) ID as displayed in your application's overview page, as you will need to provide it during the authentication process.
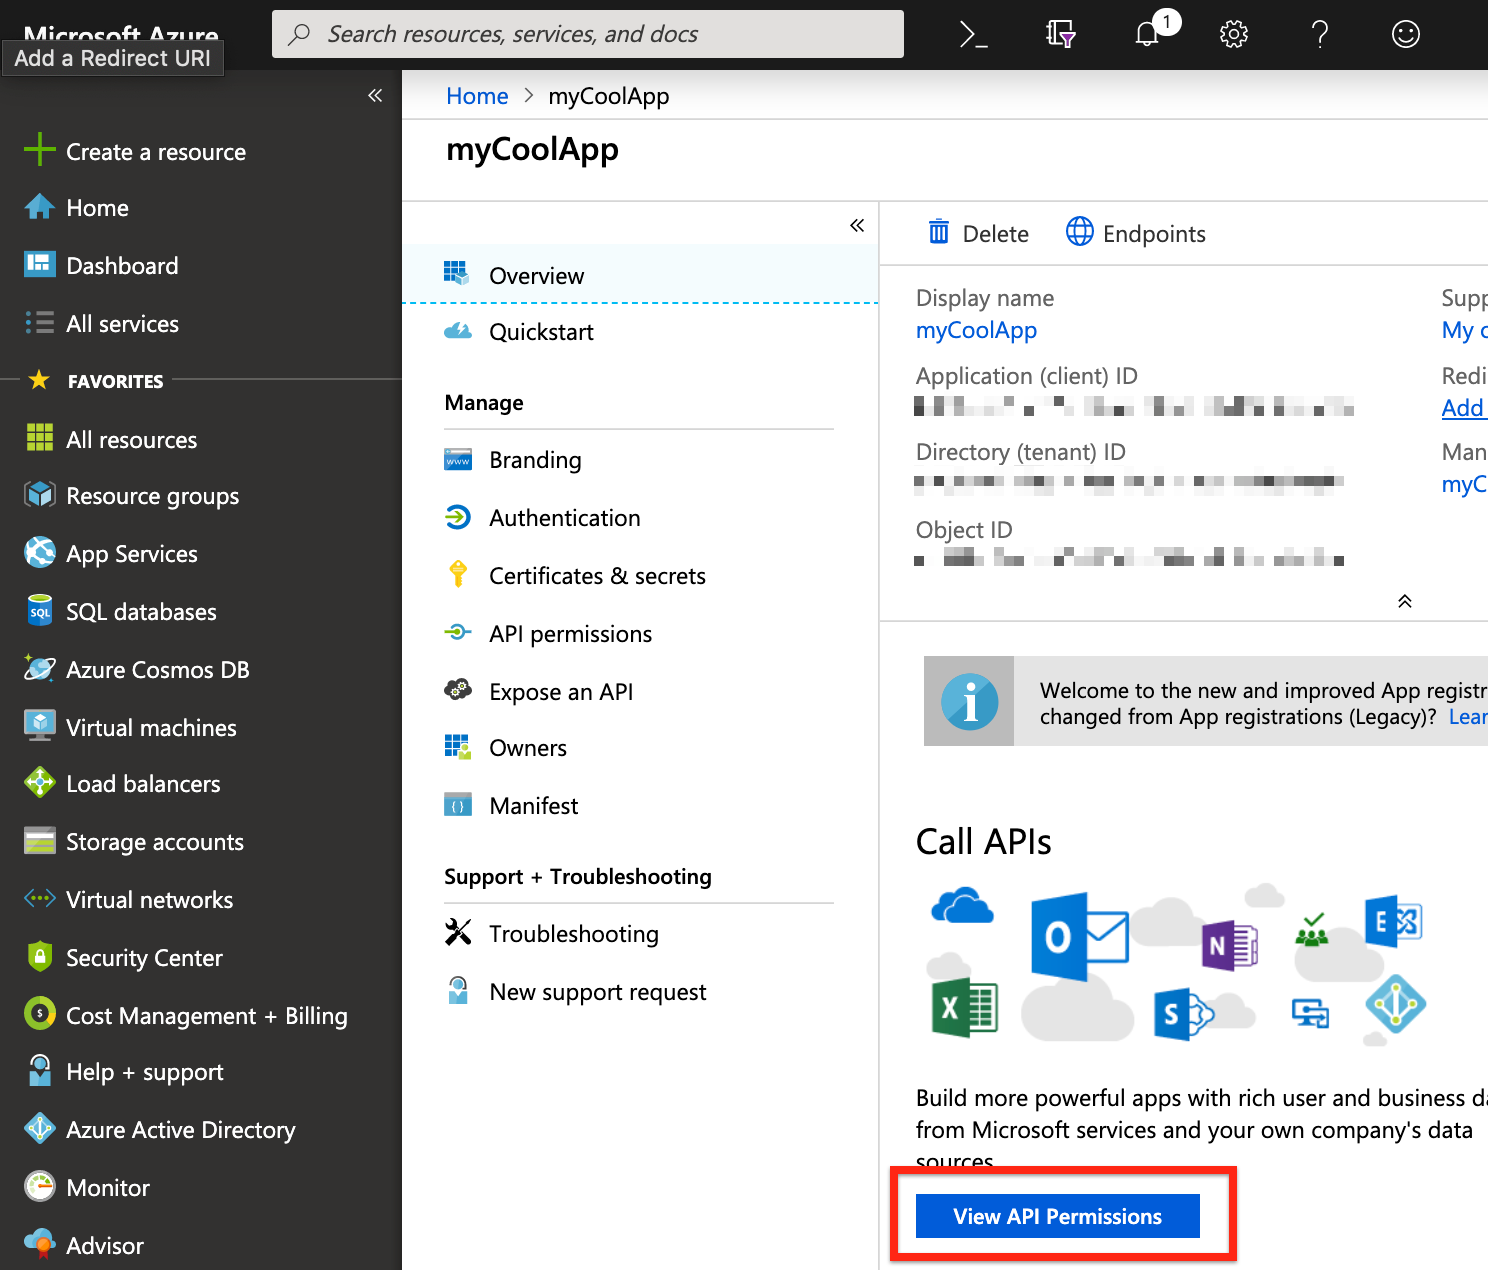
- Under the Call APIs section, click the View API Permissions button.
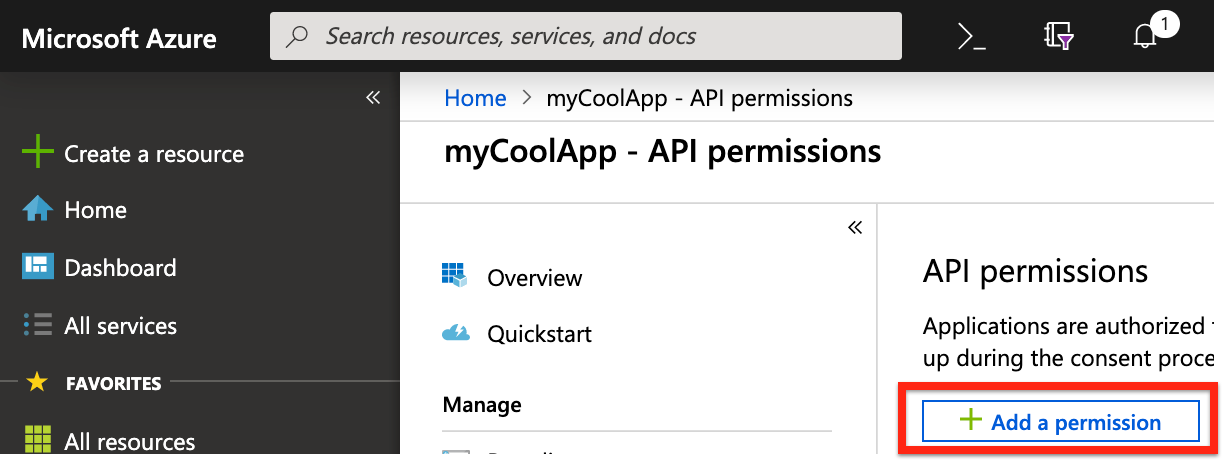
- On the API permissions page, click the Add a permission button.
- On the Request API permissions/Select an API page, select Dynamics ERP, and then enable the three delegated permissions:
AX.FullAccess,CustomService.FullAccess, andOdata.FullAccess.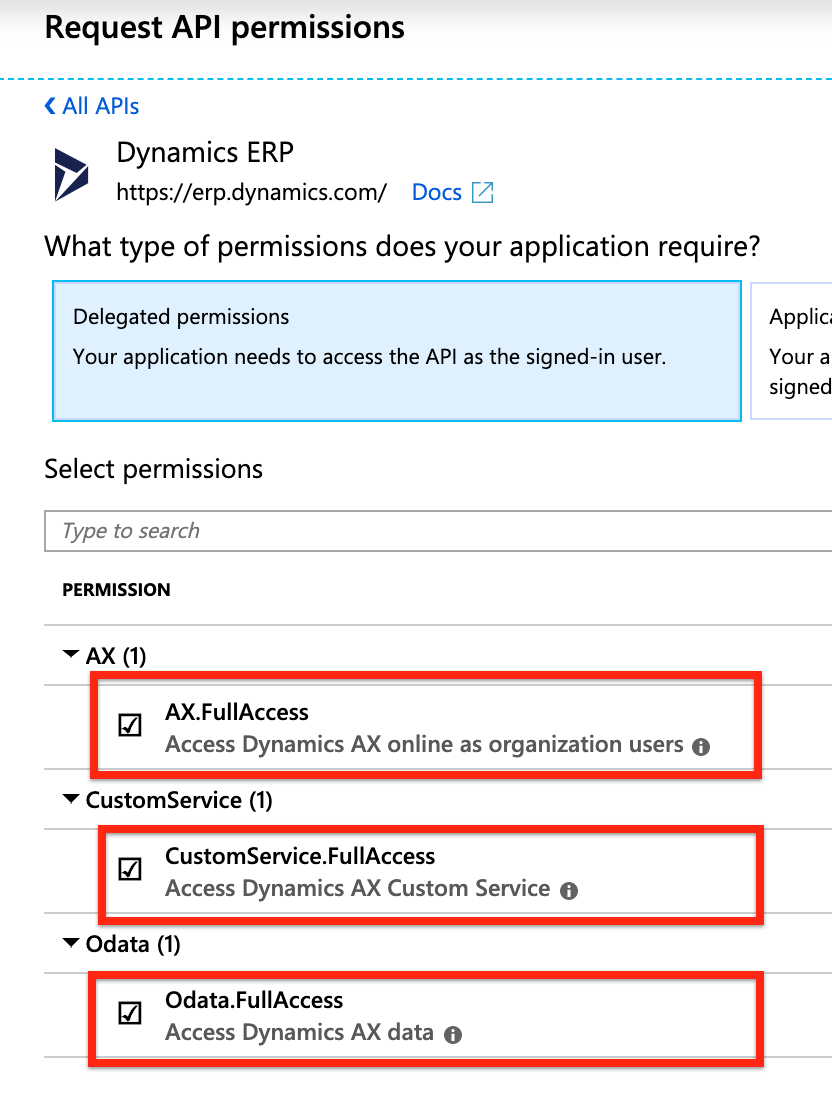
- Click Add permissions.
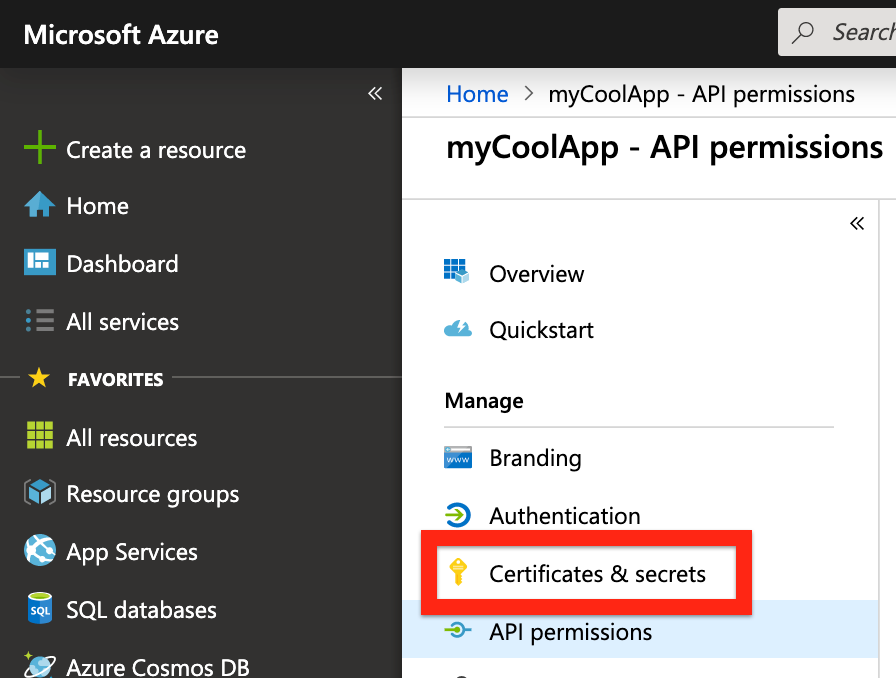
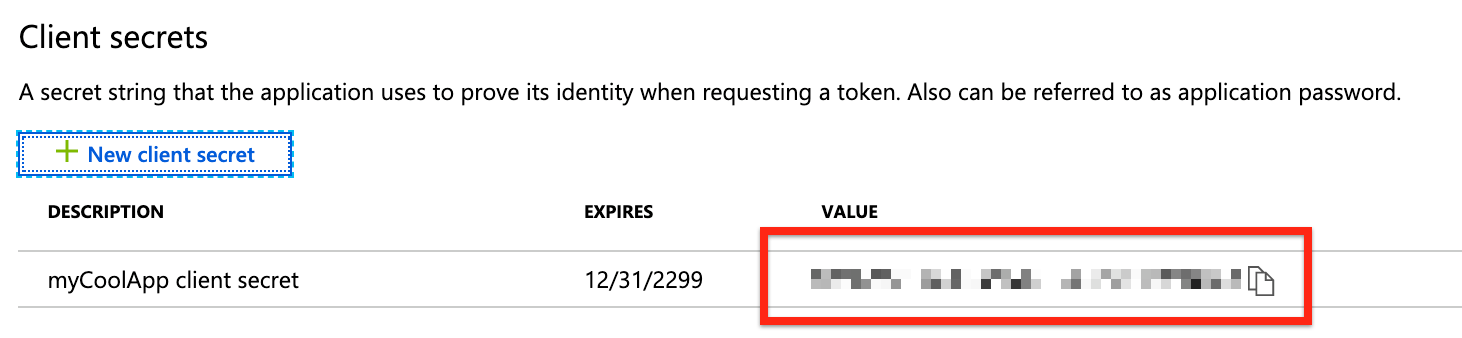
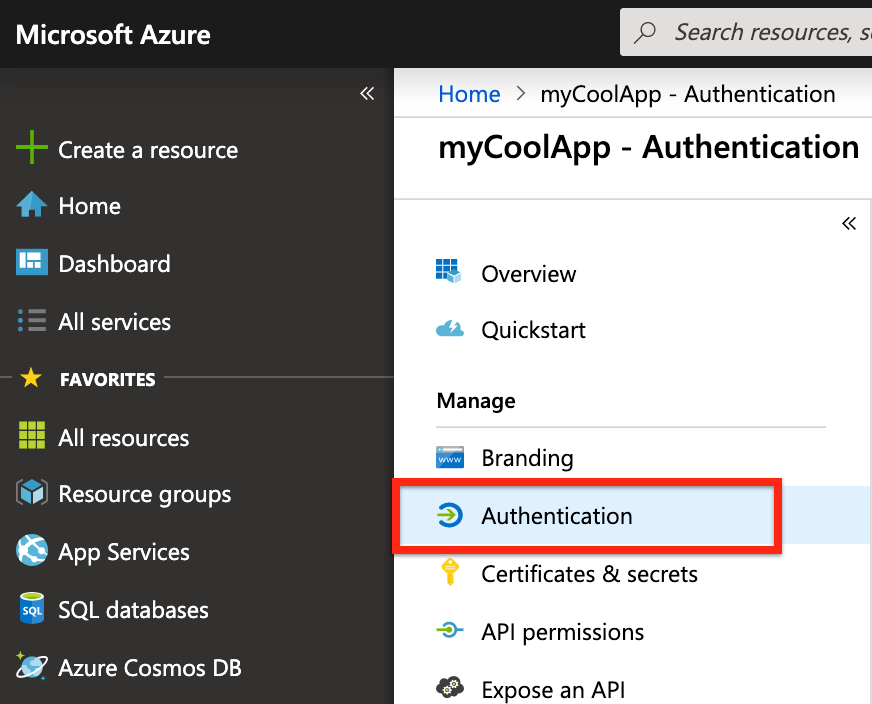
- Click the Update permissions button, and then click Certificates & secrets.
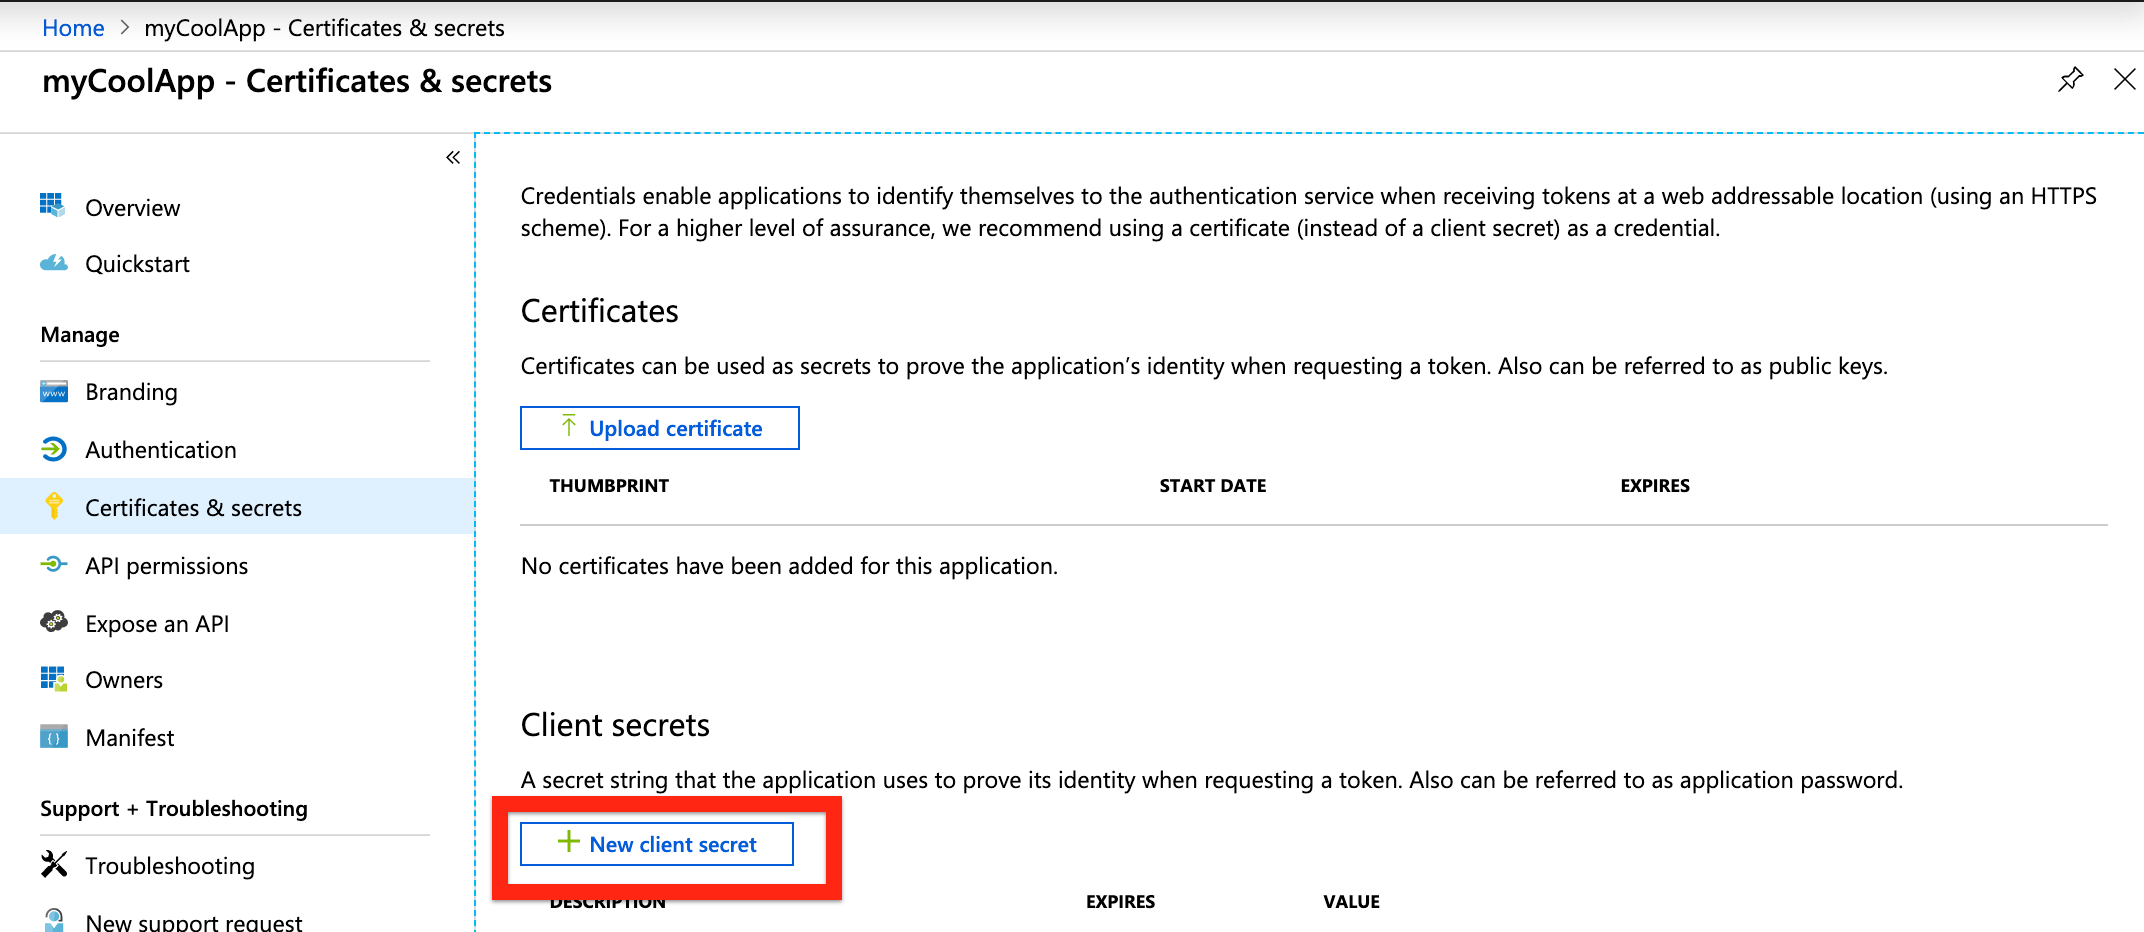
- On the Certificates & secrets page, click the New client secret button.
- Enter a name for your client secret, select the Never option in the Expires column, and click Add.
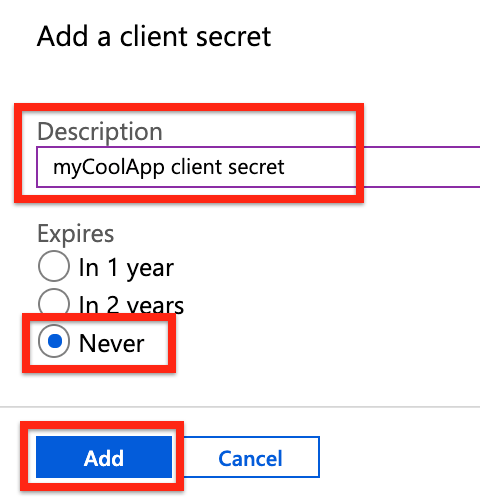
- Record the newly created client secret value, as you can't retrieve it once you leave the page.
- Click Authentication.
- On the Authentication page, add
https://auth.cloudelements.io/oauthto the Redirect URI field, and then click Save.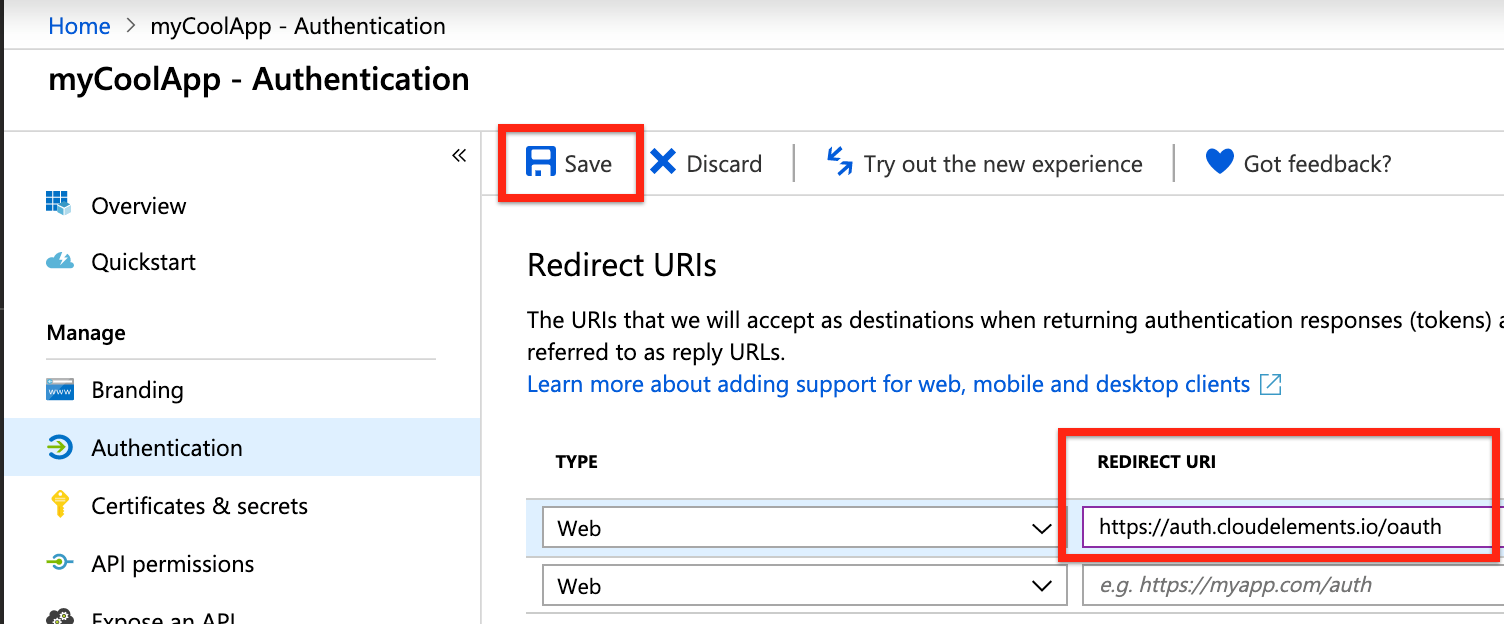


Registering the Azure Application with Dynamics 365 Finance and Operations
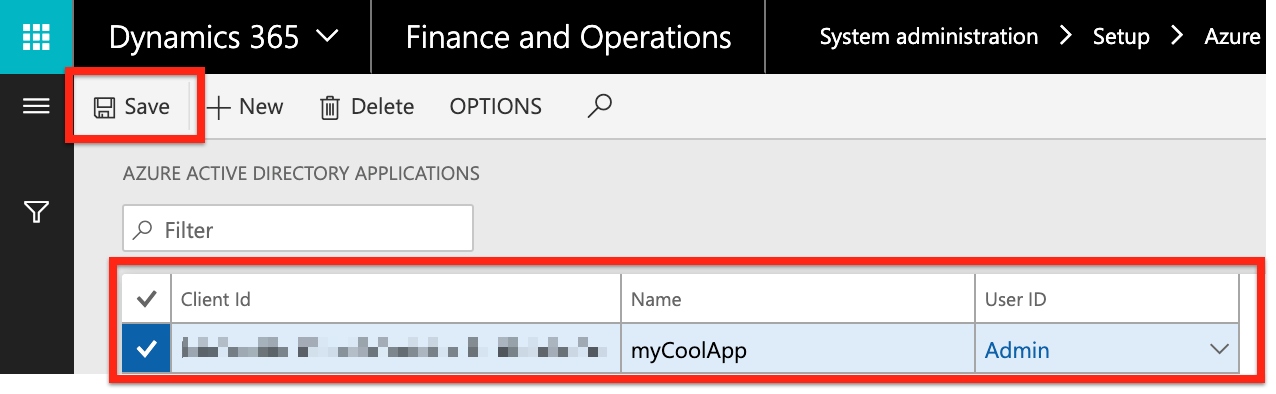
- In a web browser, navigate to Dynamics 365 Finance and Operations.
- Select System administration, then select Setup.
- Select Azure Active Directory applications, and then click New.

- Enter the following values in their respective fields:
- Client Id: the application ID registered in Azure Active Directory, which you recorded during registering the application with Azure
- Name: the name for the application
- User ID: the ID of the service account user who will have the permissions for the application's operations
- After entering the values, click Save.


After completing these steps, you should have this information recorded and available:
- Application (client) ID
- Client secret
