SAP Open Connectors supports events via polling or webhooks depending on the API provider. For more information about our Events framework, see Events Overview.
Supported Events and Resources
SAP Open Connectors supports both webhooks and polling events for Hubspot Marketing.
You can set up events for the following resources:
- Accounts
- Contacts
- Other objects that include
created,updated, anddeleteddata.
Polling
You can configure polling through the UI or in the JSON body of the /instances API call.
Configure Polling Through the UI
To configure polling through the UI, follow the same steps to authenticate a connector instance, and then turn on events. Select the resources to poll, and then click Create Instance. For more information, see Authenticate an Connector Instance with Events (UI) or the connector-specific authentication topic.
Configure Polling Through API
To add polling when authenticating through the /instances API call, add the following to the configuration object in the JSON body. For more information about each parameter described here, see Parameters.
{
"event.notification.enabled": true,
"event.vendor.type": "polling",
"event.notification.callback.url": "<INSERT_YOUR_APPS_CALLBACK_URL>",
"event.notification.signature.key": "<INSERT_KEY>",
"event.objects": "<COMMA_SEPARATED_LIST>",
"event.poller.refresh_interval": "<TIME_IN_MINUTES>"
}
Example JSON with Polling
instance JSON with polling events enabled:
{
  "element": {
    "key": "hubspot"
  },
  "providerData": {
    "code": "<AUTHORIZATION_GRANT_CODE>"
  },
  "configuration": {
    "authentication.type": "oauth2 OR apiKey",
    "oauth.callback.url": "<OAUTH2_ONLY_CALLBACK_URL>",
    "oauth.api.key": "<OAUTH2_ONLY_CONSUMER_KEY>",
    "oauth.api.secret": "<OAUTH2_ONLY_CONSUMER_SECRET>",
    "hubspot.authorization.apikey":"<API_KEY_ONLY_HAPIKEY>",
    "create.bulk.properties": "false",
    "filter.response.nulls": true,
    "event.notification.enabled": true,
    "event.vendor.type": "polling",
    "event.notification.callback.url": "https://mycoolapp.com",
    "event.notification.signature.key": "12345",
    "event.poller.refresh_interval": "5",
    "event.poller.configuration":{
      "accounts":{
        "url":"/hubs/crm/contacts?where=lastmodifieddate='${date}'",
        "idField":"vid",
        "filterByUpdatedDate":true,
        "datesConfiguration":{
          "updatedDateField":"properties.lastmodifieddate",
          "updatedDateFormat":"milliseconds",
          "createdDateField":"properties.createdate",
          "createdDateFormat":"milliseconds",
          "createdCheckTolerance": 10
        }
      }
    }
  },
  "tags": [
    "<Add_Your_Tag>"
  ],
  "name": "<INSTANCE_NAME>"
}
Webhooks
You can configure webhooks through the UI or through API in the JSON body of the /instances API call. First, you must set up webhooks in HubSpot.
Set Up Webhooks
Follow these steps to set up your Hubspot application with the endpoint.
- Via a web browser, log in to your Hubspot developer account at https://app.hubspot.com/signup/developers.
- In the developer app dashboard, select the app that you'd like to send webhooks for.
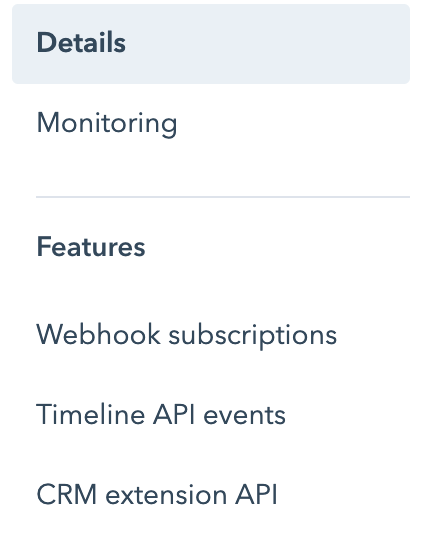
- Select Webhook Subscriptions from the navigation items displayed on the left.

The Webhooks page appears, where you see a field to enter the target URL. - In order to get this URL, create an instance on HubSpot Marketing connector.
- While creating an instance, enable Events under Events Configuration and select Webhook as the Vendor Event Type.
- Click Create Instance.
- Choose an account through which you'd like to create an instance.
- You're now taken back to SAP Open Connectors. Select Instances on the navigation pane on your left and edit your instance.
- You will see a field named Webhook URL as shown below.

You can now copy the URL, complete step 4 and click Save. - Next, you'll need to set up individual subscriptions for each object and event type for which you'd like to receive a notification. Do this by clicking Create Subscription.
- Now, follow the prompts to configure the subscription.
Set up Workflow Webhooks
Follow these steps to set up your Hubspot application with the endpoint.
- To create a workflow webhook, go to https://app.hubspot.com/ and select the account through which you'd like to create an instance with SAP Open Connectors.
- On the HubSpot Reports Dashboard, navigate to Automation > Workflows and click Create Workflow.

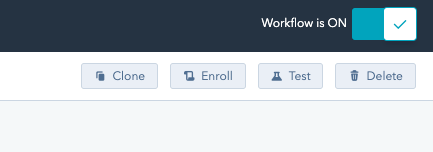
- Set enrollment triggers and add an action. Make sure that workflow is on in the top-right corner.

- Once you've created a workflow, you should be be to see the workflow ID in the URL.

In the above example, 3024516 is the workflow ID. - Create an instance and enter this workflow ID in the corresponding field.
Your workflow webhook is now created.
Configure Webhooks Through the UI
To configure webhooks through the UI, follow the same steps to authenticate a connector instance, and then turn on events. For more information, see Authenticate a Connector Instance with Events (UI) or the connector-specific authentication topic.
Configure Webhooks Through API
To add webhooks when authenticating through the /instances API call, add the following to the configuration object in the JSON body. For more information about each parameter described here, see Parameters.
{
"event.notification.enabled": true,
"event.vendor.type": "polling",
"event.notification.callback.url": "<INSERT_YOUR_APPS_CALLBACK_URL>",
"event.notification.signature.key": "<INSERT_KEY>",
"event.objects": "<COMMA_SEPARATED_LIST>"
}
event.notification.signature.key is optional.Example JSON with Webhooks
Instance JSON with webhooks events enabled:
{
  "element": {
    "key": "hubspot"
  },
  "providerData": {
    "code": "<AUTHORIZATION_GRANT_CODE>"
  },
  "configuration": {
    "authentication.type": "oauth2 OR apiKey",
    "oauth.callback.url": "<OAUTH2_ONLY_CALLBACK_URL>",
    "oauth.api.key": "<OAUTH2_ONLY_CONSUMER_KEY>",
    "oauth.api.secret": "<OAUTH2_ONLY_CONSUMER_SECRET>",
    "hubspot.authorization.apikey":"<API_KEY_ONLY_HAPIKEY>",
    "create.bulk.properties": "false",
    "filter.response.nulls": true,
    "event.notification.enabled": true,
    "event.vendor.type": "webhooks",
    "event.notification.callback.url": "https://mycoolapp.com",
    "event.notification.signature.key": "12345",
    "event.objects": "Contact,Account"
  },
  "tags": [
    "<Add_Your_Tag>"
  ],
  "name": "<INSTANCE_NAME>"
}
Parameters
API parameters are in code formatting.
| Parameter | Description | Data Type |
|---|---|---|
key | The connector key. hubspot | string |
code | The authorization grant code returned from the API provider in an OAuth2 authentication workflow. | string |
Namename | The name for the connector instance created during authentication. | string |
authentication.type | Identifies how you are authenticating with Hubspot Marketing. Either oauth2 or apiKey. | string |
Create Bulk Properties for Migrationcreate.bulk.properties | Identifies if you want to create custom properties in Hubspot for bulk uploads. | string, must be true (Yes) or false (No) |
oauth.callback.url | OAuth 2.0 authentication only. The URL where you want to redirect users after they grant access. This is the Callback URL that you noted in API Provider Setup. | string |
oauth.api.key | OAuth 2.0 authentication only. The Client ID from Hubspot Marketing. This is the Client ID that you noted in API Provider Setup. | string |
oauth.api.secret | OAuth 2.0 authentication only. The Client Secret from Hubspot Marketing. This is the Client Secret that you noted in API Provider Setup. | string |
Hubspot API Keyhubspot.authorization.apikey | API Key authentication only. The hubspot API key that you noted in API Provider Setup. | string |
Events Enabledevent.notification.enabled | Optional. Identifies that events are enabled for the connector instance. Default: false | boolean |
Event Typeevent.vendor.type | Optional. Identifies the type of events enabled for the instance, either webhook or polling. | string |
Event Notification Callback URLevent.notification.callback.url | For webhooks and polling. The URL where your app can receive events. | string |
Callback Notification Signature Keyevent.notification.signature.key | For webhooks and polling. Optional A user-defined key for added security to show that events have not been tampered with. This can be any custom value that you want passed to the callback handler listening at the provided Event Notification Callback URL. | string |
Objects to Monitor for Changesevent.objects | For webhooks and polling. Optional Comma separated list of objects to monitor for changes. | string |
Event poller refresh interval (mins)event.poller.refresh_interval | For polling only. A number in minutes to identify how often the poller should check for changes. | number |
Configure Pollingevent.poller.configuration | Optional*. Configuration parameters for polling. | JSON object |
| resource name e.g., contact, account, etc. | The configuration of an individual resource. | JSON object |
URLurl | The url to query for updates. | String |
ID FieldidField | The field that is used to uniquely identify an object. | String |
Advanced FilteringdatesConfiguration | Configuration parameters for dates in polling | JSON Object |
Updated Date FieldupdatedDateField | The field that identifies an updated object. | String |
Updated Date FormatupdatedDateFormat | The date format of the field that identifies an updated object. | String |
Created Date FieldcreatedDateField | The field that identifies a created object. | String |
Created Date FormatcreatedDateFormat | The date format of the field that identifies a created object. | String |
| tags | Optional. User-defined tags to further identify the instance. | string |


