To set up a new application in NetSuite, you must have administration integration privileges. Contact your system administrator if you do not have those privileges.
Enabling RESTlets
For RESTlets to work on Netsuite, please enable the feature on your account by navigating to:
Setup > Company > Enable Features > SuiteCloud > Server SuiteScript.
To authenticate a connector instance with NetSuite, you must know your Account ID,
Get your NetSuite Account ID
To locate your account ID:
- Via a web browser, log in to your NetSuite production account http://netsuite.com/login
- In the menu, click Setup, Integration, then Webservice Preferences.
- Copy the ACCOUNT ID.
Custom Authentication
SAP Open Connectors supports NetSuite's token-based authentication with a custom authentication flow. For detailed provider information, see NetSuite's Token Based Authentication documentation.
In order to authenticate using token-based/custom authentication, you must provide:
- Consumer key
- Consumer secret
- Access token ID
- Access token secret
- Deployment ID and Script ID
You will also need to enable token-based authorization for your account, create an integration record for your application, create a relevant role, assign the role to a user, and generate your credentials/token.
Follow these steps:
- Sign in to Netsuite, navigate to Setup > Company > Enable Features > Suite Cloud > Manage Authentication. Enable Token-Based Authentication and click Save.
- To create an integration record, navigate to Setup > Integration > Manage Integrations and select New.
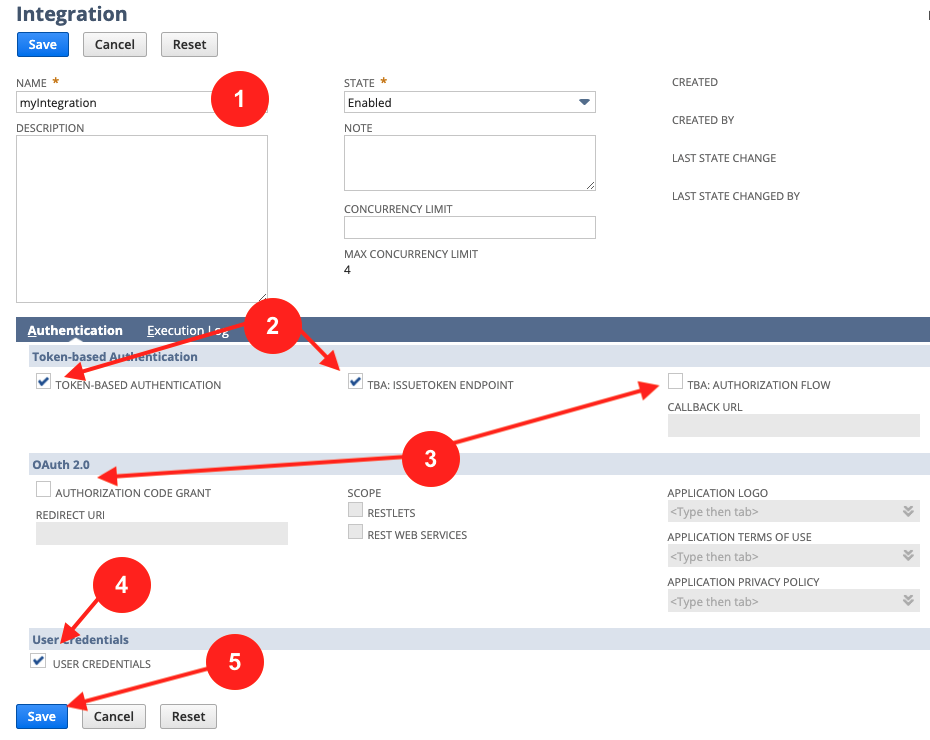
- On the Integration page, do the following:
- Provide a name for your integration in the Name field
- Enable Token-Based Authentication and TBA: Issuetoken Endpoint
- Disable TBA: Authorization Flow and Authorization Code Grant
- Enable User Credentials
- Click Save
 After saving your integration, your consumer key and secret are displayed. Record these values, as this is the only time they will appear, and they cannot be retrieved again.
- Create a new custom role for the token-based authentication user by navigating to Setup > Users/Roles > Manage Roles > New.
On the Role page, do the following:
Provide a name for the role in the Name field.
In the Setup tab of the Permissions section, add the User Access Tokens permission. Also add any additional relevant permissions based on your integration's needs and scope; for detailed information about available permissions, see Netsuite's documentation.
Click Save.
After successfully creating the role, navigate to Lists > Employees > Employees. Either select an existing employee listing, or create a new one.
In the Roles section of the Employee page, assign the role you created above by selecting it from the Role menu and clicking Add. Click Save after assigning the role.
After creating the employee and assigning the role, navigate to Setup > Users/Roles > Access Tokens > New.
- On the Access Token page, select the application, user, and role you created above. Add a name for your token, and then click Save.
After saving the access token, your token ID and secret are displayed. Record these values; as with the consumer key and secret above, this is the only time the token ID and secret will be displayed.

 After saving your integration, your consumer key and secret are displayed. Record these values, as this is the only time they will appear, and they cannot be retrieved again.
Generating Script ID and Deployment ID
A NetSuite RESTlet is provided by SAP Open Connectors as a default script in the SAP Open Connectors NetSuite environment. Once deployed, a script Id and deployment Id is generated. Before provisioning an instance with Netsuite RESTlets, you need this script Id and the deployment Id. Here is how you can get them.
- Pick your SuiteScript file from https://github.com/cloud-elements/netsuiterestlets-releases/releases.
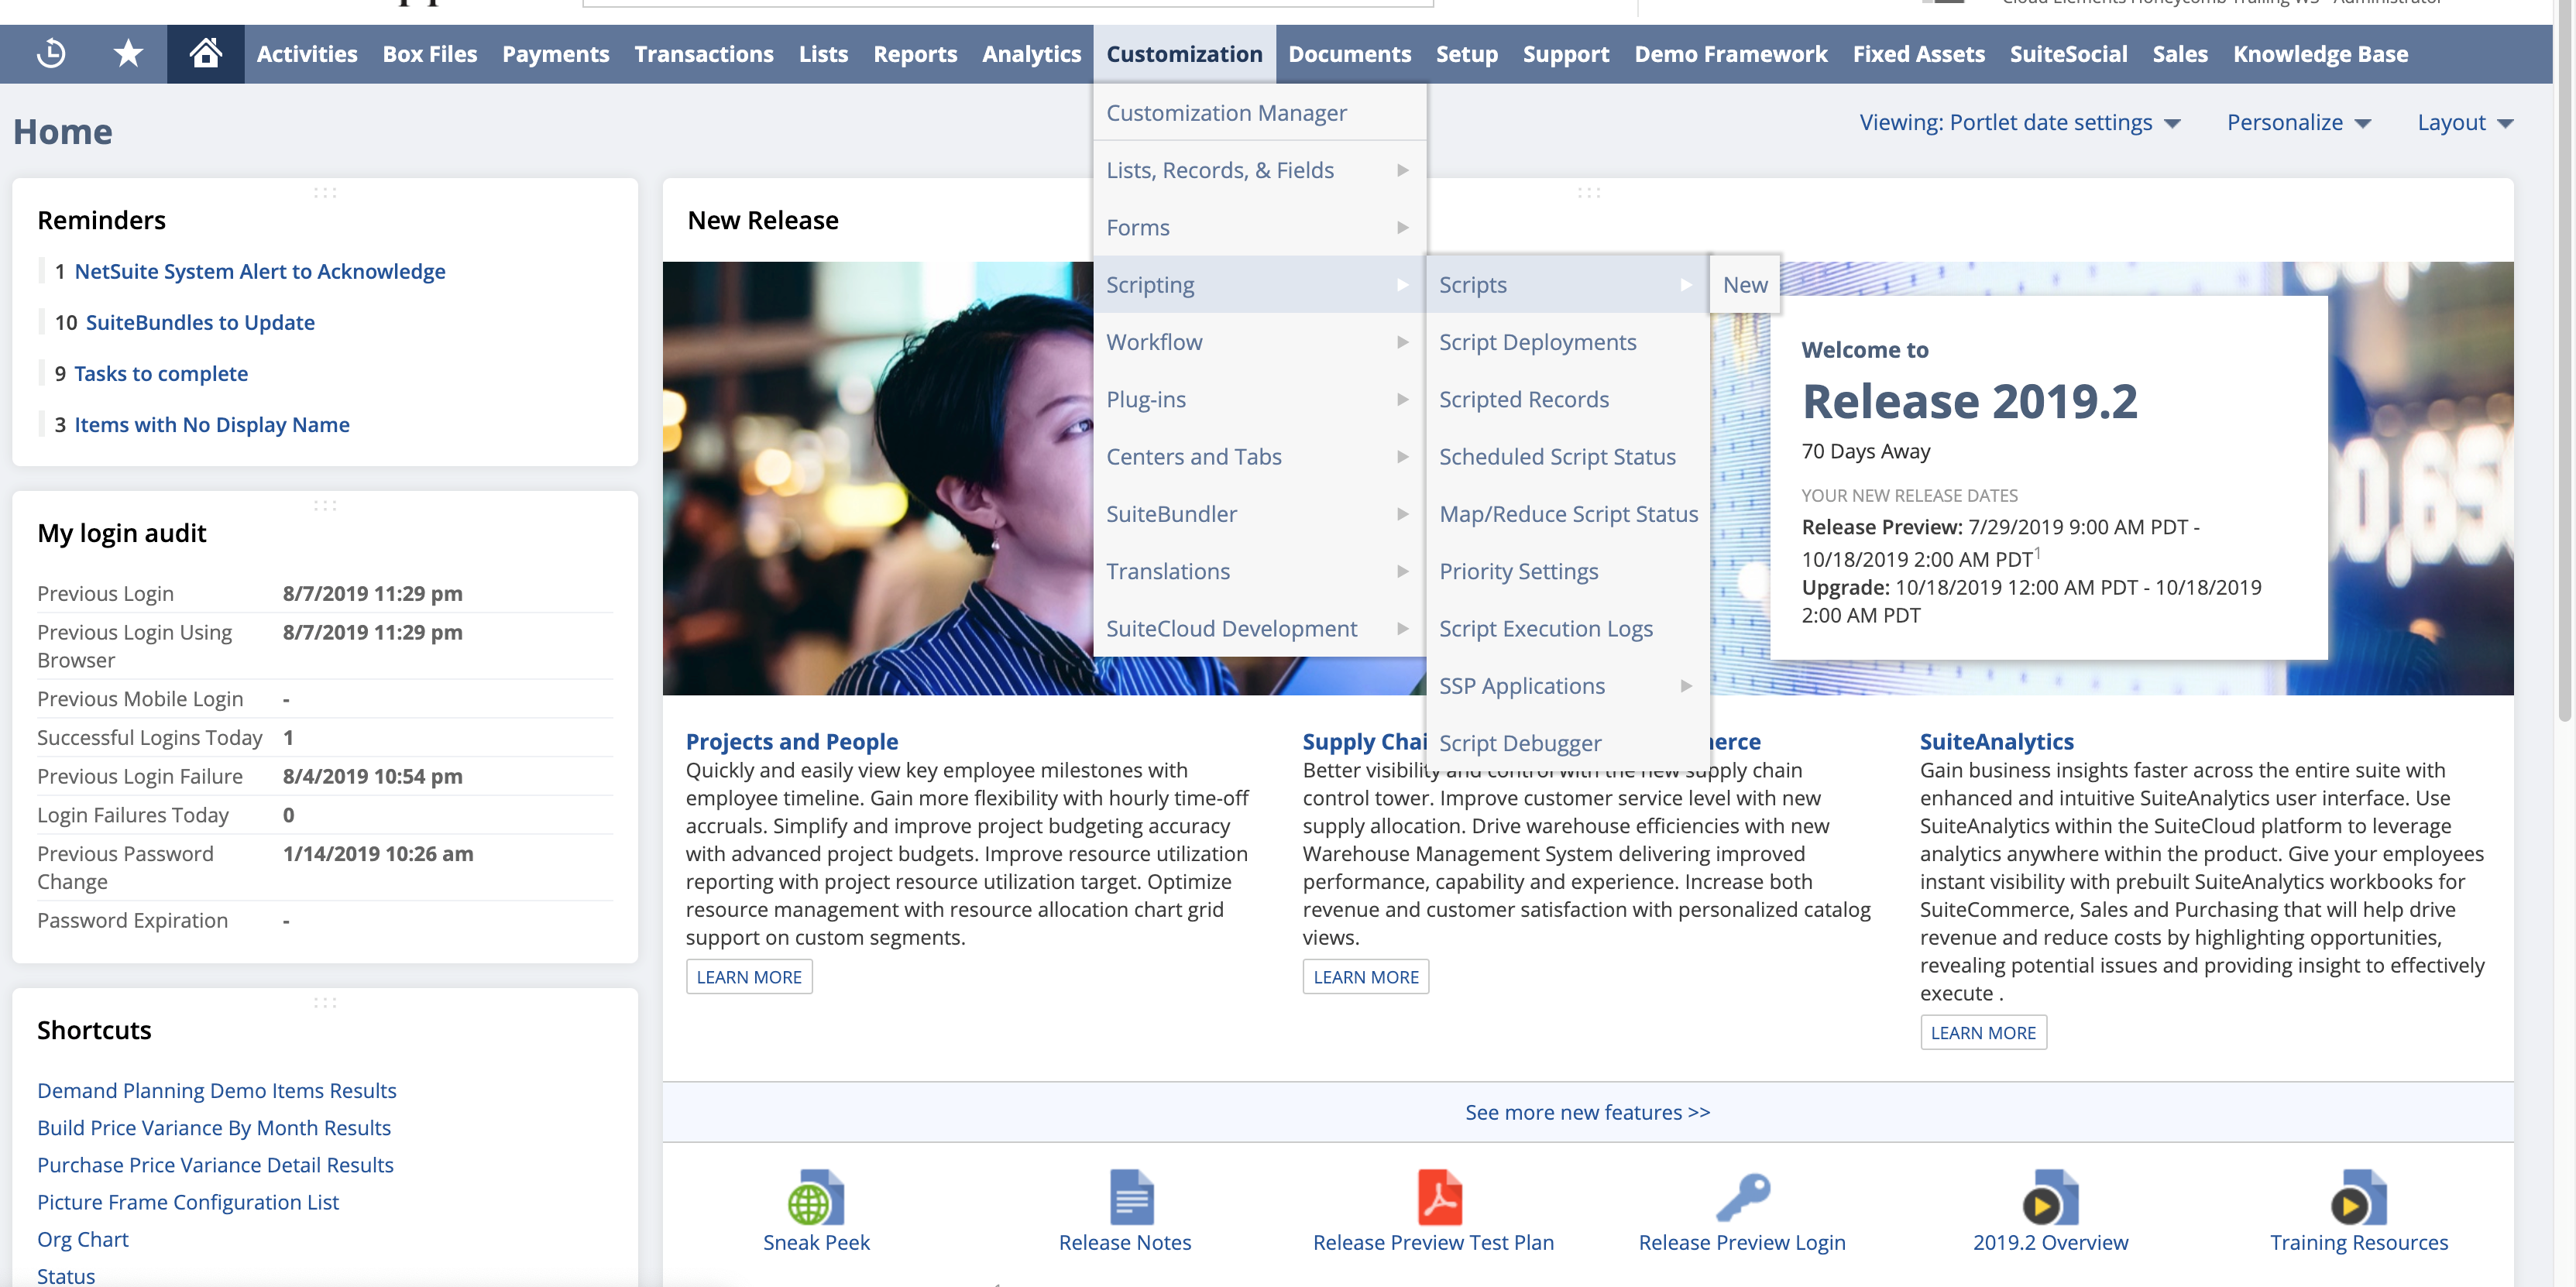 On the home page, click the Customization tab and navigate to Scripting > Scripts > New, as shown in the image above.
 - Upload your file and deploy it on the NetSuite environment.
- Click Create Script Record after selecting the file you want to upload.
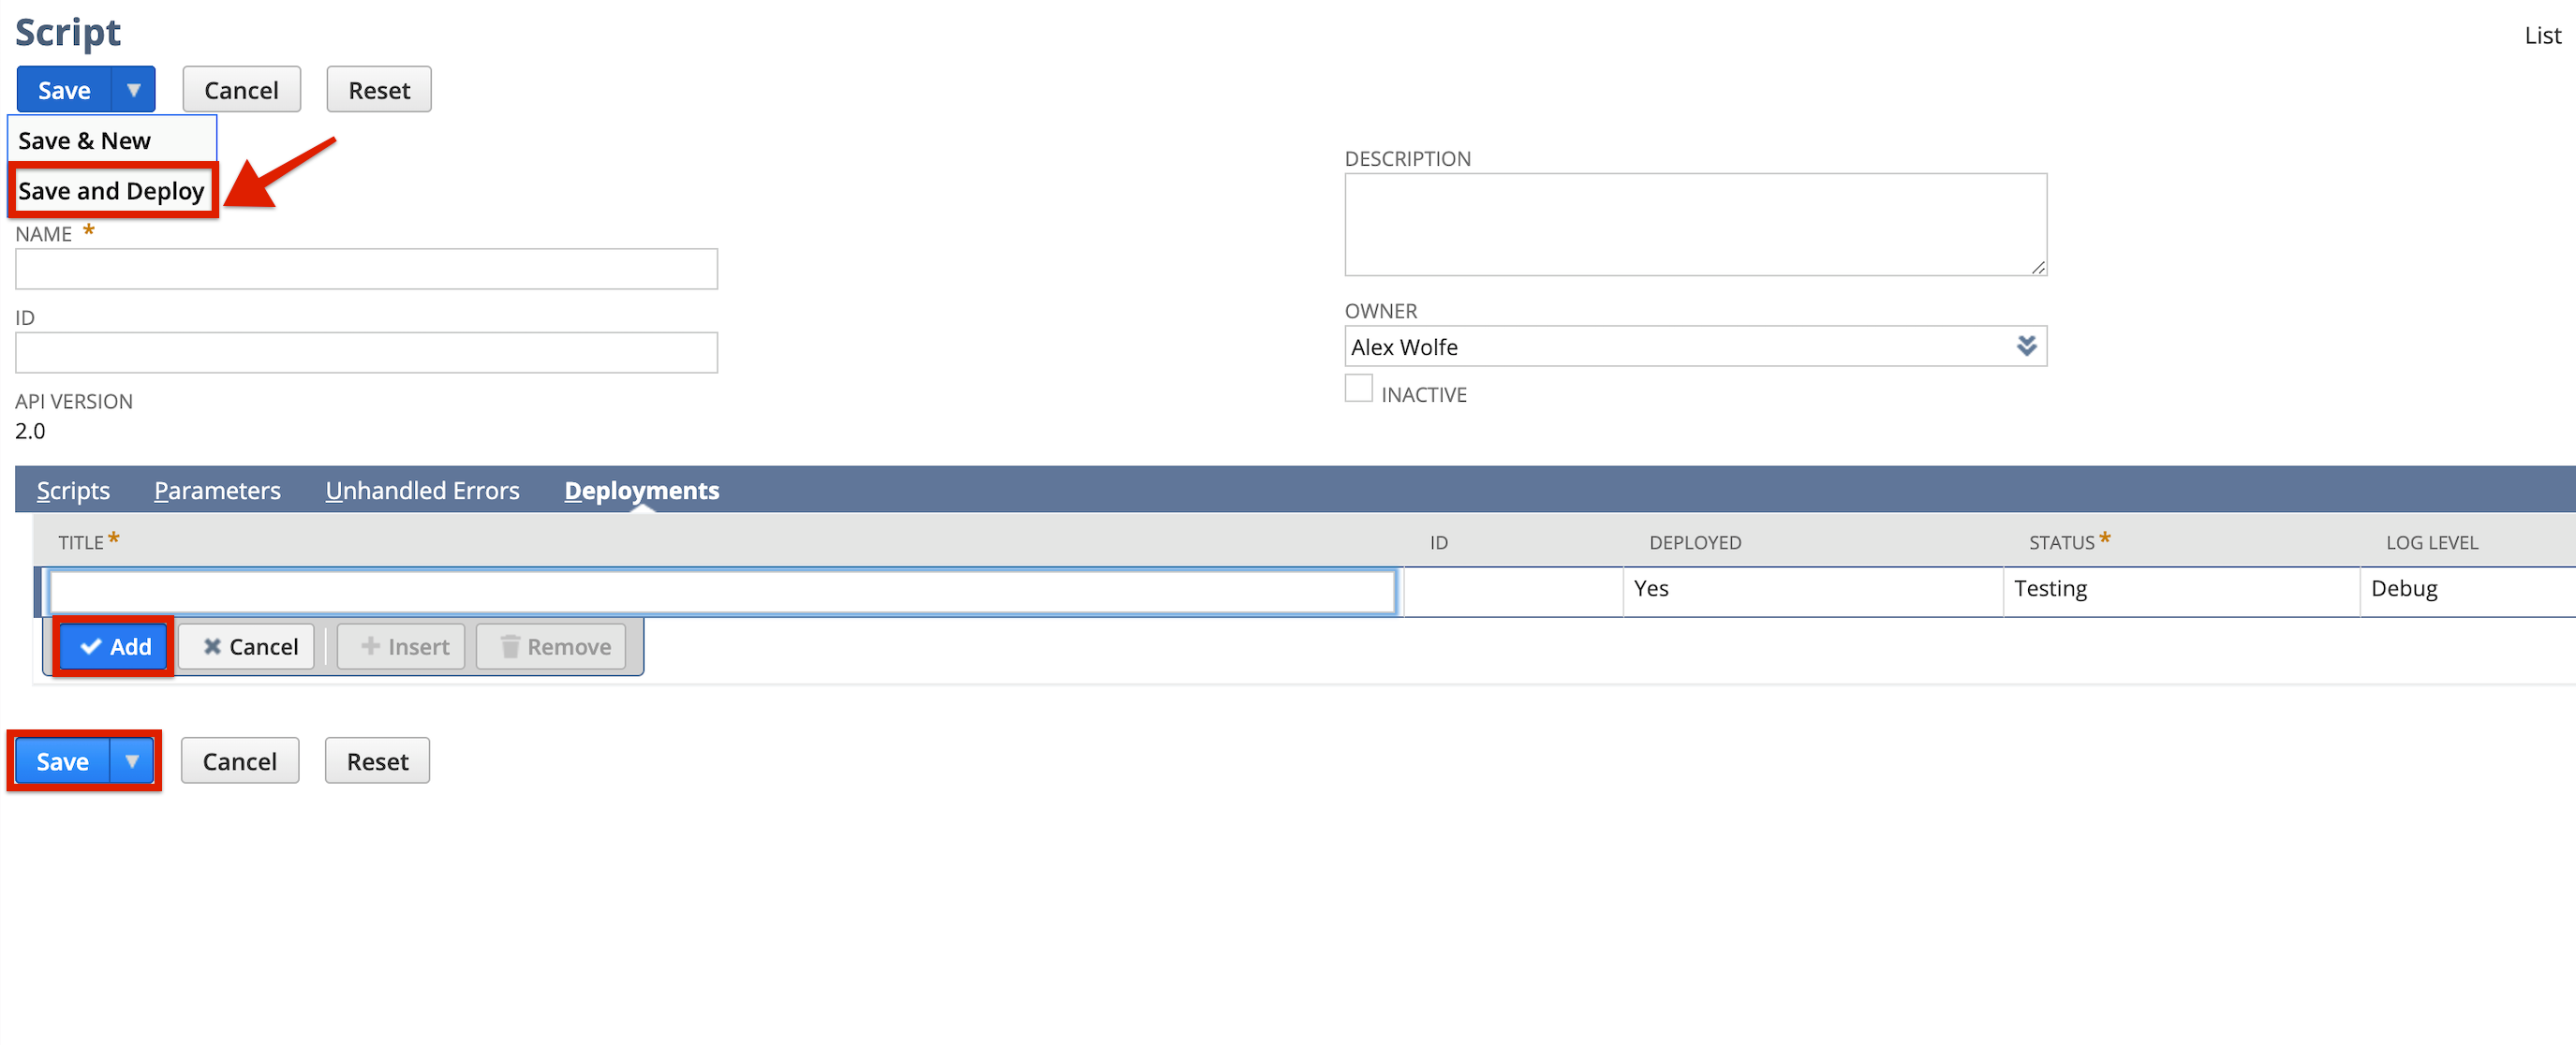
- After you upload the file, Save and Deploy it.
- A script Id and deployment Id is generated.
- Use the script Id and deployment Id to provision your instance with NetSuite RESTlets.
 On the home page, click the Customization tab and navigate to Scripting > Scripts > New, as shown in the image above.
